Perm tuning studio REMIX decided to create caterpillar all-terrain vehicle
on the basis of the Okovsky or VAZ engine and test some controversial ideas regarding such equipment on it. The original idea of the team was to build caterpillar all-terrain vehicle with an engine from a car (OKA or VAZ 2108), bridges from VAZ 2101 and Nivovskaya RK.
The hull should look like a boat and be made of metal. Wheels from the VAZ on eight-wheeled hubs will serve as rollers.
Tracked all-terrain vehicle, like all similar ones, will have a differential rotation. Drive - caterpillars without stars and tires.

In order to all-terrain vehicle got the opportunity to move on wheels, it was decided to use the following type of drive:

There was also an alternative solution regarding the wheel-tracked base:

Frame construction:


The bridge beams must be welded into the body of the so-called "boat", and the middle hubs will be removable.
After all calculations were completed, construction began:


With such a transmission, the minimum speed is 1.137 km / h, and the maximum, in turn, is 30.09 km / h. Purely theoretically thirty horsepower The Okovsky engine in this speed range will be able to tow the UAZ sideways on the asphalt. It is not known how the transmission will “look” at this, but purely theoretically, the forces should be enough))
Boat welding.
Front and rear slopes
bottom 2mm.
Board - 1mm.
The rest is galvanized 0.55mm.


With a width of the middle part of the all-terrain vehicle 800mm and a track width of 450mm ground clearance is 200mm. This is quite enough - you can see the video.
Video of the first tests:
On the basis of a walk-behind tractor, home-made all-terrain vehicles and other off-road vehicles are often made. There are several reasons for this:
- there is an energy-saturated transport unit with high traction characteristics, assembled on a frame;
- engine and transmission control moved to comfortable handles;
- the mass of walk-behind tractors is low, they can be transported to the right place in the trunk, body or on a car trailer.
For hunting and fishing, a light mini all-terrain vehicle is quite in demand. But the industry has not yet seen commercial prospects in creating sets of attachments that convert a serial walk-behind tractor into off-road vehicles. There are quite interesting examples of the creation of such machines. Do-it-yourselfers have created role models with their own hands. There is room for ideas when developing new interesting devices.
Features of all-terrain vehicles from a walk-behind tractor

The main components that should be purchased or made independently for a vehicle based on a walk-behind tractor:
- frame, it serves to organize a mobile vehicle;
- the rear axle is needed to install the rear wheels;
- a seat for the driver, it is desirable to protect it from moisture and dirt from under the wheels;
- the lighting system is needed to move safely at any time of the day.
An all-terrain vehicle based on a walk-behind tractor is created as a single vehicle. Its load capacity should be about 200 kg. The width is calculated from the conditions of rollover resistance, usually it is from 1100 mm or more.
Modern motoblocks Neva, Ugra, MTZ and others are equipped with engines with a capacity of more than 10 hp. This power is enough to move at speeds over 10 km/h. Off-road, when passing slurry or swampy places, the speed may drop to 1-2 km/h.
How to make a homemade wheeled all-terrain vehicle

An example of an all-terrain vehicle drawing on low-pressure tires
It makes sense to equip the base unit. The reason is that gasoline and diesel engines have the best torque performance at a crankshaft speed of about 75-85% of the maximum.
The engine must have a forced cooling system. When driving at low speed, the oncoming flow will not be enough to maintain the optimal thermal regime.
Rover frame

An example of a frame-fracture drawing
A frame is created between the front and rear axles. It is better to use profile pipes of rectangular or square section. They provide greater rigidity than rolled angles, channels and I-beams of the same weight.
The docking of the frame elements of a wheeled all-terrain vehicle can be rigid, then it will be formed in a one-volume format. Using heavy walk-behind tractors"Neva" or MTZ this option will be preferred.
As an option, a breaking frame (fracture) is made, the option is used for areas with a complex profile. Here the articulation is carried out through the kingpin. The front and rear axles have independent suspension. Masters create such all-terrain vehicles on the basis of the Neva and Ugra motoblocks.
For hunting and fishing, it is better to have a wheeled all-terrain vehicle with a breaking frame. Its permeability is higher than when using a rigid frame design.
Rear axle and suspension of a homemade all-terrain vehicle

Some DIYers use a ready-made rear axle from passenger car. For example, from the car "Moskvich-412": its small mass allows you to install it on a light all-terrain vehicle. Suspension is carried out on shock absorbers for a smooth ride and reduced vibration.
Other craftsmen make independent suspension on each rear wheel. This approach is implemented on the scooter "Ant". When driving, there is a slight swaying, at the same time, the wheels experience less resistance on bumps, fuel consumption is noticeably reduced.
The rear axle is connected to the frame with long hardened bolts. For elastic joints, rubber inserts are used, for example, silent blocks. It improves performance characteristics all-terrain vehicle based on a walk-behind tractor.
The rear axle on skis is used in winter. The resistance to movement is minimal, the design is greatly simplified.
Wheels (low pressure chambers)

To move on wet and unsteady ground, lugs can be used. They provide high grip. Large-diameter low-pressure chambers perform even better. Pneumatics have a minimum pressure on the ground, and the presence of air enclosed in the all-terrain vehicle chambers will make it possible to create a floating all-terrain vehicle.
For installation on the rear axle, home-made or special wheels for all-terrain vehicles, swamps and snowmobiles are used. They are purchased as an assembly or as separate elements: tire, camera, disk. The wheel is easy to assemble.

It is possible to increase the patency of ordinary wheels on low-pressure chambers by creating an additional tread. For example, additionally secure the cameras with chains, a conveyor belt, self-made tracks, or in another way.

Another option is to cut an overhead lug out of the tire. The hook depth of the structure reaches more than 20-25 mm. The rolling resistance increases, while the slip coefficient decreases sharply.
Assembling a homemade all-terrain vehicle from a walk-behind tractor
When all the tools, spare parts and accessories are prepared, you can start assembling. This is a rough plan on how to assemble a homemade all-terrain vehicle, it all depends on the design chosen.
- A walk-behind tractor is installed on a welded or finished frame.
- The rear axle is mounted and, if necessary, the front axle.
- The seat is on the frame.
- If provided for by the drawing and diagram, the steering is mounted.
- Protection is attached to the frame, it is made of plastic or metal sheet.
- The future driver should try out the convenience of landing, if necessary, provide auxiliary devices for adjusting the landing.
- Checking the functionality of the brakes.
- Electrical circuits and lighting fixtures are being installed.
As individual elements and assemblies are manufactured, their performance is checked. It provides for a fivefold margin of safety.
After the bench tests are completed, the field tests begin. You need to know how the car behaves in difficult conditions.
Buy a hitch and trailed to a walk-behind tractor in online stores
Homemade caterpillar all-terrain vehicles do it yourself
The use of caterpillars will help reduce the specific pressure on the ground. The weight is distributed over the entire area of the tracks. Such an all-terrain vehicle propulsion unit based on a walk-behind tractor is able to overcome sand, wetlands, steep slopes and other obstacles.
Some do-it-yourselfers make tracks for tracks made of metal plates with a thickness of more than 5 mm. Rings from water pipes are welded to the plates. Another version of the tracks is made entirely of PVC pipes, cut lengthwise. Trucks are attached to each other on a conveyor belt or other base.

It is easier to make tracks from composite materials. For this, fiberglass and epoxy resin are used. Glass polymer reinforcement is used as a frame. Tracks are made in special forms. After making the right amount, they are assembled into a caterpillar. In the manufacture of tracks from composite materials, elements for articulation from wear-resistant steels are used.
There are options for using tracks made of wood. They will need to be impregnated with protective mixtures.
The easiest way to make a track for an all-terrain vehicle based on a walk-behind tractor is to use a conveyor belt. One track needs two strips. They are connected into a ring, and then a caterpillar is created with the help of segments of a steel pipe.
On the video you can see the option of making a waterproof hull that is kept afloat. In this case, the caterpillar mover will allow you to move not only on land, but also on water. Get an amphibious all-terrain vehicle. For hunting and fishing, it will be indispensable.
Lightweight all-terrain vehicles with huge cameras are able to overcome severe off-road conditions that other types of off-road vehicles cannot pass. Self-made vehicles of this type are simple, since they do not have a complex technical base, which is what won the recognition of most home craftsmen. Such equipment is especially in demand among residents of rural areas, where precipitation greatly reduces the quality of roads, as well as among lovers of hunting, fishing and extreme recreation.
Varieties of homemade all-terrain vehicles
Depending on the type of construction and chassis, the following types of homemade all-terrain vehicles are distinguished:
- Boat swamps. They have a simple design and are relatively cheap to manufacture. They are equipped with an outboard motor and allow you to move around shallow waters.
- caterpillar swamp allows you to drive over overgrown water bodies, but it is rather complicated and expensive to manufacture, as it requires the attachment of a special type of caterpillars.
- All-terrain vehicle on low-pressure tires- the simplest and most promising type of swamp, the performance of which depends on the design and reliability of tires.
Some homemade products later become serial models. This happened with, which is now known all over the world.
Types of homemade all-terrain vehicles on low-pressure tires
Homemade all-terrain vehicles on low-pressure tires, having the same principle of off-road movement, may differ in type of design. There are the following main types of vehicles of this type:
1. All-wheel drive caracat. In its design, it uses transmission and chassis elements from obsolete types of cars. It has four-wheel drive, a transfer case, and an adapted boat hull in its lower part and tightness add buoyancy to the all-terrain vehicle. Designed to overcome swamps and swamps, capable of delivering goods and people to inaccessible areas.
2. Tricycle on low pressure tires. It features the simplest design, and can be made by almost any car enthusiast in a garage. The IZH Planet 3 motorcycle is often taken as the basis for such an all-terrain vehicle, thanks to its endurance and unpretentiousness. 
3. Homemade karakat with motorized sidecar engine FDD. Its feature is the location of the engine not under the frame or gas tank, but under the seat or at the rear of the all-terrain vehicle frame. Chassis parts are traditionally taken from cars, and motorcycle elements are used in the front. For the manufacture of the frame, pipes, channels and corners are used. 
4. All-terrain vehicles with low-pressure tires based on cars or ATVs. They are made using ready-made main units by reworking the transmission and chassis, as well as equipping them with low pressure tires. 
How to make an all-terrain vehicle on low pressure tires?
The work on the manufacture of an all-terrain vehicle begins with the preparation of an action plan, the full implementation of which means the achievement of the desired result. The following tips will help you save time and money:
- The availability of free time, allowing you to regularly perform work on the assembly of the all-terrain vehicle. In its absence, it is better not to start at all.
- Budget planning. Self-creation of an all-terrain vehicle allows you to save on the purchase of a serial model, but in order to eliminate unnecessary expenses, you need to make all the calculations and buy the necessary components and parts, as well as leave a certain amount for unforeseen expenses or breakdowns.
- Plan development. If you have experience in the development of vehicles or the makings of a design engineer, it is possible to independently create a drawing of an all-terrain vehicle. In the absence of such, they use someone else's experience and ready-made drawings, of which there are a sufficient number on the Internet.
DIY low pressure tires
Tires of this type visually resemble huge pillows that support the entire structure. The degree of adhesion in such wheels allows you to make the vehicle passable on any off-road. Depending on the design features, such tires are divided into the following types:
- Arched. They differ in increased dimensions in comparison with a standard wheel in width by 5 times, and have a thickness of up to 700 mm. The pressure in them, as in an ordinary ball, is 0.05 MPa. Mounted exclusively on the main drive.
- Wide profile. Differ in an oval design and pressure below standard up to 2 times. Most commonly used in trucks.
- Toroid. They are made in a chamber and tubeless version, they are highly popular among motorists.
- Pneumoroller, having lugs to improve cross-country characteristics, and stiffening ribs, giving the entire structure stability and strength.
The cost of factory-made low-pressure tires can be out of reach for many motorists. But for your own all-terrain vehicle, it is quite possible to make such a wheel on your own. Work is performed in the following order:
1. Choice source material, for example, tires of agricultural or aviation equipment, as well as other types of industrial vehicles. 
2. The tread is cleaned, washed and dried, after which the desired patterns are drawn to create your own pattern, as well as remove excess wire and rubber.
3. To remove excess wire, the inside of the wheel is trimmed and the cord is removed using.
4. Excess rubber is also removed with a winch, making cuts around the circumference, and fixing them with pliers to the cable, gently pulling and cutting with a knife.

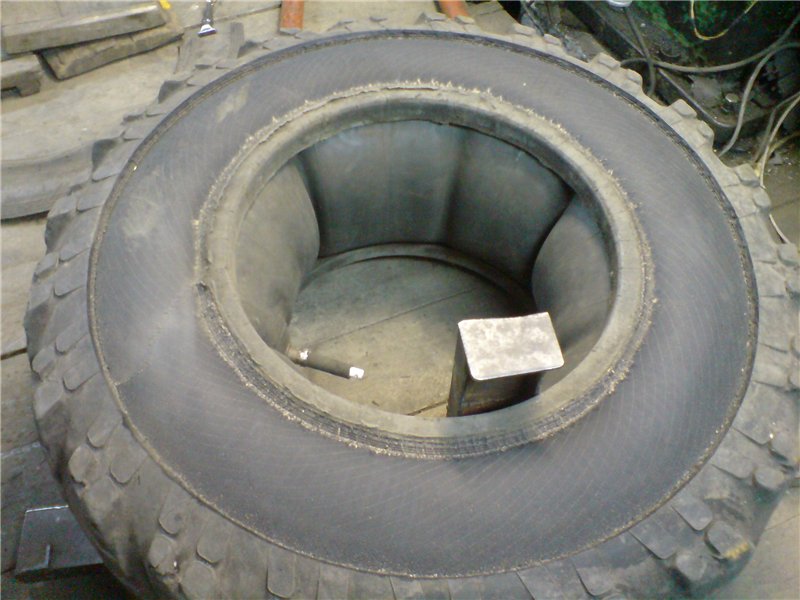
5. After removing the tread layer, the surface is cleaned with sandpaper.
6. Assembling the disk. To do this, use a standard disc cut in half, or welded from plates and pipes, and then carefully polished to prevent damage to the chamber. 
7. The tire is pulled over the rim and secured with straps or a fire hose, after which it is inflated. The wheel is ready. 
What type of tread to choose for an all-terrain vehicle?
To select the right type of tread for an all-terrain vehicle with low-pressure tires, the following factors must be considered:
- The protector must be capable of self-cleaning. This property is especially relevant for the use of an all-terrain vehicle in harsh and wetlands.
- When using an all-terrain vehicle on peat bogs, tires are chosen with a low and shallow terrain, otherwise if their top layer breaks, the grip will be insufficient for full movement.
- When used in snowy areas and on sandstones, tires with a rare pattern are chosen.
Choosing an engine for an all-terrain vehicle
Most often as a power unit for self-manufacturing all-terrain vehicle use the following type:
- Motorcycle.
- ZAZ car.
- Motoblock.
- Domestic cars.
The presence of a certain engine in an all-terrain vehicle does not make a fundamental difference. It is more important to take into account such a feature as ensure sufficient cooling, since the vehicle is operated all year round in various temperature conditions and at low speeds. The ZAZ engine is excellent for this, well tolerated by temperature changes. All-terrain vehicles running on motor-block power units, also proved to be the best.
Another main criterion for choosing an engine for future homemade is its power.
The reserve of power must be sufficient so that the all-terrain vehicle on low-pressure tires can drive out of mud, water, or deep snow.
By choosing a unit with a power reserve, they get the best performance, prevent overheating and create conditions for the longest possible service life.
Features of the chassis of the all-terrain vehicle
The undercarriage of all-terrain vehicles on low-pressure tires is made in the form to give the all-terrain vehicle best qualities cross-country ability, increasing the comfort of driving a vehicle and driving comfort for the driver and passengers. This type of construction has the main drawback - the complexity of manufacturing.
To create it, pipes, corners and channels are used, made of durable alloy steel, creating a strong foundation that can go out for several years without breakdowns. The frame is made both solid and articulated. The latter has a high working potential, but the complexity of manufacturing makes it quite rare in home-made designs.
The sequence of self-assembly of the all-terrain vehicle
Assembling an all-terrain vehicle on low-pressure tires includes the following steps:
1. Selecting the type of all-terrain vehicle and the base on which units and parts will be mounted. For this, frames of cars or motorcycles are used, as well as homemade design, developed on its own or borrowed from other people's drawings.
2. Manufacture and assembly of the suspension with the rear axle. For this optimal solution is an independent design, and although much more time will be spent on its creation, the result will be an all-terrain vehicle with higher qualities of patency and ride comfort.


3. Mounting wheels. Produced after completion of work on the creation rear axle and pendants. Metal hubs are used to mount the cameras. Properly made or selected low pressure wheels will provide an all-terrain vehicle with increased driving safety and good handling. 
4. Mounting the engine. Special attention while being given correct device cooling systems. 
5. Mounting additional systems. Includes the connection of the brake system, communications for the outlet exhaust gases, clutches and . At this stage, the body of the all-terrain vehicle and lighting devices are being installed.
6. Completion of work and implementation of a pilot test, which shows the performance of nodes and systems. If there are problems or points that need to be improved, the shortcomings are eliminated, after which the all-terrain vehicle is ready for operation. 
Video test homemade all-terrain vehicle
As soon as winter begins in our country, given the climate, two-wheeled vehicles are removed to the garage until spring. It may be impossible to use the car for transportation due to heavy snow. And here a snowmobile on tracks comes to the aid of all motorists who want to move along a snowy road, which can be made from a walk-behind tractor with your own hands.
Not everyone has the opportunity to buy an additional vehicle for themselves, but everyone can independently design a home-made caterpillar snowmobile from a walk-behind tractor.
Advantages and features of a homemade snowmobile

- The vehicle has a mechanical drive and a caterpillar walk-behind tractor, when driving on which, you will not get stuck in snowdrifts.
- Management is due to skis, and steering system is in front, so you can easily control it.
- The price when buying a vehicle is important. Therefore, if you calculate, the cost of manufacturing a snowmobile on your own will be five times lower than buying it from a manufacturer. And even cheaper, it will come out due to the available walk-behind tractor and other parts.
- Reliability - where a person will not pass and a car will not pass, a snowmobile will overcome all obstacles with ease.
- If the snowmobile is made by hand, then the designer approaches the choice of parts very carefully. By doing everything yourself, you are responsible for the quality of your design. In addition, paying great attention to the nodes of the mechanism, you make the snowmobile all-terrain.
The device of a homemade motor-block snowmobile
This is a sought-after invention that you can do yourself with quality parts. The walk-behind tractor is taken partially (individual parts) or used completely. If you choose to use it outside of complete set, it must be welded supporting frame from rear axle, steering fork and wheels. The most difficult stage in this case is the transformation of the working shaft of the walk-behind tractor into a drive gear.
The most practical and versatile solution in the manufacture of self-propelled guns will be the use of parts from a walk-behind tractor. You only need to remove the steering fork and engine from the finished walk-behind tractor.
The motor can be located at the rear of the structure.
Before starting the self-production of the structure, draw a drawing, assemble the entire necessary material, prepare the tool, and you can proceed. The design is quite simple and anyone can handle it, technical education and some skills are not required for this.
If you did not graduate from the Faculty of Engineering and it is difficult for you to draw up a drawing, use ours.

Drawing a simple frame for a homemade snowmobile
The drawing shows the frame that you will need in the manufacture of the snowmobile.
A walk-behind tractor in a homemade caterpillar snowmobile is the main part due to which your vehicle will move.
If everything is done correctly according to the drawing, you will have a goose-based snowmobile.

Snowmobile frame drawing on tracks
Making a caterpillar snowmobile with your own hands
Before starting work, decide on the tool. You can say with 100% certainty what you need: various screwdrivers, a hammer, welding, a pipe bender (if there is no finished frame).
Before preparing a drawing for self-manufacturing a snowmobile, familiarize yourself with the standard configuration.
- Frame. Each snowmobile has a frame: the more complex the design, the more reliable and strong the frame must be. The best option- take from an ATV, scooter or motorcycle. If there is no such part, you can weld it yourself from pipes with a diameter of at least 40 mm.
- Seat. The seat on the snowmobile must be strong, as the structure itself is quite low.
Mandatory condition: the seat must be made of waterproof material.
- Engine. When choosing an engine, pay attention to its power. If you want to powerful snowmobile was, then the engine should be so.
- Tank. A container with a volume of 10-15 liters, made of metal, is perfect for a fuel tank.
- Skiing. If you do not have ready-made skis that can be adapted for a snowmobile, you can make your own from wood. It is better if it is plywood of at least nine layers.
- Steering wheel. When choosing a steering wheel, think about your comfort. It is best if it is borrowed from a two-wheeled unit.
- Caterpillars. Making tracks is perhaps the most difficult part in the whole self-propelled.
- Drive unit. In order for the tracks to rotate, you will need a drive - it is best to use a chain from a motorcycle in this case.
Frame
If there is no finished frame available, then it is easy to weld it from a profile pipe, and give it a shape using a pipe bender.
If it is not possible to make calculations and draw up a drawing on your own, then for example, use the drawing from our website.
Once the frame is assembled, treat it with an anti-corrosion compound and cover it with a quality paint that will withstand both moisture and frost.
caterpillars
Everyone who previously independently designed a caterpillar walk-behind tractor notes: making caterpillars is the most difficult process in homemade work.
The easiest way to construct them is from tires from a car. This option is the most advantageous - high-quality and low-budget. The part is made in a closed circle, so tire break cannot occur.

Caterpillars for a snowmobile from a tire (tire)
Instructions for making caterpillars:
- From a car tire: take a tire and cut off the sides (it is better to do this with a sharp knife). You need to cut so that the flexible part with the tread remains.

What can be done from the UAZ with your own hands. SUV drawings do it yourself
| Section Categories | |||||||
|
(from the Homemade ATVs section)
Schemes and drawings of wheeled, tracked and airmobile homemade products that will be useful for independent design and construction. Description of various designs of equipment for off-road use, as well as individual nodes and units of a homemade all-terrain vehicle. layout diagrams and dimensions a variety of all-terrain vehicles (on wheels, low-pressure tires, skis, snowmobiles, airboats and "all-terrain vehicles" on an air cushion), built with their own hands.
| Total materials (schemes / pictures / drawings) in the category Drawings and diagrams of self-made all-terrain vehicles: 14 On this page, only a part of them. To see all the rest, use the "leaflet" at the bottom of the page. To go to the section, click on the photo, to view the material - More details. | |
| We also hope that you will find a lot of interesting things for you at the links below: you can choose the most interesting category for you in the column on the left, or find the answer to your question in the articles from the menu at the top right >>> Enjoy watching! | |
Video drawings of all-terrain vehiclesUnusual display method for diagrams and drawings. Watching video - online [ Add a photo of the rover ] |
|
www.vezdehod.poprostomu.com
Do-it-yourself side-turning all-terrain vehicle: drawings, manufacturing photos
The craftsman built with his own hands a wheeled all-terrain vehicle for fishing and hunting trips through forest impassability and swamps. The design feature of the all-terrain vehicle is in the presence of automatic tire inflation and side turn.
We suggest that you familiarize yourself with the device of an all-terrain vehicle on low-pressure tires in more detail.
The frame is made of 76 mm diameter tube with a wall thickness of 3.5 mm.

For transmission, I purchased such 16V-1 circuits.

We also needed gearboxes from the 5B-S walk-behind tractor.


The figure shows a sketch of the hub.


- from the engine to the gearbox 1-1.45,
- reduced 1 to 24,
- increased 1 to 11,
- back 1 to 17.
On the gearbox, the leading star has 9 teeth and goes to the driven one by 35 teeth.
Gearbox dimensions.

Drawings of the hubs, holes for tire inflation will be additionally made.

Hub axis drawings. Steel 45 was used. The diagrams do not indicate an air channel perpendicular to the axis, the size was also increased from 28 to 45 mm, there was a decrease between the bearings.


Lifan engine installed.


The swap implementation scheme looks like this.

Welded exhaust system.

The figure shows a diagram of the direction of the exhaust.


A boat pear is used to inflate tires, so nipples were made for it.


Fastening the driven stars on the hubs.

In total, six similar parts were welded to the hub, and the dimensions were changed upwards, that is, instead of 8, 10 were made:

Swapping was performed in this way:


To combat the rotation of the tires, the width of the discs was cut to 40 cm, teeth were also welded from the electrodes, and then the tires were seated using construction sealant. The author also began work on the tires themselves, eliminated punctures and cuts with the help of piercing with an awl and sealant.


During the opening of the hunting season, the all-terrain vehicle was used a lot. There were some breakdowns, in particular, the engine overheated, the chain lock opened and the chamber nipple broke due to tire rotation. But pumping exhaust helped to get to the place of repair. All wheels were pumped up by 0.1 atmospheres.
As a result, about 10 liters of fuel were consumed for 42 kilometers, which is quite a bit for an all-terrain vehicle.

Tire inflation is used quite often, especially in the off-season, when temperatures fluctuate from +20 to -15 degrees, which greatly affects tire pressure.
A single boat is also transported in the trunk, which is also very convenient to pump up with exhaust.
The video shows a homemade all-terrain vehicle in action.
Popular homemade products from this category
auto-samodelki.ru
2QM.ru: Do-it-yourself dumps for UAZ (drawings)
An SUV in the household of the owner of a suburban area, taking into account the quality of the roads, is an excellent help, and sometimes even a necessity. Under the hood of such a unit there are almost a hundred, and sometimes more working “horses”, which, coupled with an impressive mass and driving characteristics, becomes a serious argument in the fight against off-road.
Why not use this power to improve the traffic situation in the local adjoining territory in winter period? Manufacturers have long been preoccupied with suitable attachments, producing a snow plow for UAZ and other SUV models popular in our country. Why not save money and make your own blade model, given that handicraft options turn out to be just as good, and sometimes even better than factory ones? 
Factory option
You should not reinvent the wheel, it is much easier to peep how to make a dump on an UAZ from manufacturers. Most likely, it will not be possible to completely copy the factory suspended dumps, but it is quite possible to take some models as a basis. In addition, a detailed study of proven options will avoid many mistakes in the design and manufacture of your own snow shovel.

Design
Much depends on the availability of materials and technical skills. It is more reliable and easier to make a blade without a swivel mechanism, thus saving a little on materials and significantly reducing the production time, but this will reduce its scope. On the other hand, the rotary mechanism can become the most vulnerable spot design, its execution requires a certain margin of safety at the fixation nodes. The working surface of the blade also requires reinforcement, it is important to monitor the weight of individual parts. It is desirable that the blade can be mounted and dismounted by one person.
To protect the surface to be cleaned, a rubber strip should be used, the fastening of which should be detachable so that the rubber can be replaced as it wears out. In the place where the blade is attached to the vehicle, it is necessary to provide for a possible sharp collision of the blade with an obstacle. Mounting points should not be located in front of important parts of the car. 
Material selection
At this stage, the choice always remains with the performer, you can only advise or suggest where it is easiest to find suitable parts. 200 liter barrels have proven themselves as a material for a dump shovel, but, given the planned dimensions, 2 barrels or additional structural reinforcement will be required. Square or rectangular pipes can be used as guides and reinforcing ribs, it is also possible to use a rolling angle, a thin channel or I-beam jumpers.
For adjusting the angle of inclination of the blade, jumpers can be used with turnbuckles or pipes of different diameters with holes for fixing pins. When using a winch to control blade lifting, additional material will be required to equip the site for the winch itself and the system of blocks, if necessary. 
Homemade dumps on UAZ in the network
On the net, you can find many examples where artisanal craftsmen demonstrate the assembled dump on the UAZ with their own hands. The drawings of talented craftsmen are very diverse, some offer simplified options, others use various modifications that are sometimes more successful than factory products.

Main stages and nodes
Where to start work in order to realize the planned dump on the UAZ with your own hands? The drawings must be made taking into account the model of the SUV, and there must always be some margin in size so that possible shortcomings can be leveled on the spot. First of all, it is best to equip the place where the structure is attached to the car. It can be either simple fixed brackets, or a whole platform like a “kenguryatnik” to accommodate not only a blade, but also a winch with a block system. The site can be made both in a permanent design and as a removable structure, which is preferable, as it does not spoil the appearance of the car.
Next, you can start manufacturing the most massive part of the blade - a working shovel. It is best to choose the dimensions from the above written 2 x 0.6-0.8 m. Too large a plow cleans the snow better, but it will be inconvenient during installation and transportation. On the next step it is better to fix the blade in a working vertical position and so attach the remaining elements to it. It must be remembered that even simple blades on a UAZ without a swivel mechanism must be vertically movable, otherwise the car can be severely damaged during operation. The last step is to make control and rotary elements and attach them to the structure. 
Lifting mechanisms
You can see options where a manual drum winch is used as a lifting mechanism, and it is controlled by a person located on the front platform. This is not very safe, it would be better to raise and lower such dumps on the UAZ after the car has completely stopped.
Usage electric winches much more convenient and safer, but not everyone is ready to spend money on such equipment. by the most budget option there will be a special stand that works when reversing auto, and to constantly hold the blade in the upper position in the transport mode, you can use a turnbuckle.
Conclusion
The work of the master is afraid, they say. Do-it-yourself blade for UAZ, or factory assembled, will help you use your SUV not only as a means of transportation, but also as a faithful helper in the household.
2qm.ru
Homemade SUV
Many of us at least once in our lives have puzzled over the idea of making a car. Himself. Someone in childhood tried to build a car out of cardboard, someone devoted all their free time to this, turning the construction of cars with their own hands not even into a hobby, but into the meaning of life.
Here it is necessary to distinguish a little between concepts. For some, building a car means welding a couple of channels for half a liter, attaching an engine from a Cossack, wheels from a seeder and a bridge from a ZIL thrown into scrap - a kind of under-tractor that almost any village can boast of. Such "auto-lizards", as a rule, have a real "bestial" appetite and do not live long. For others, building a car is a matter of several months, sometimes years, painstaking work with a scientific approach, calculations and careful manufacture of every detail.

In particular, making an SUV with your own hands requires doubly effort. Of course, if you want to get not only a bunch of iron that looks like a car from a distance, but quite efficient car, overcoming off-road, with moderate fuel consumption and a decent exterior.
The project below is actually implemented, operating and created on the basis of an ordinary passenger car. When creating an SUV, you need to understand a few clear rules for yourself, the observance of which will be the key to the success of the entire event.
First, remember - the car must be a frame. We will not delve into the issues of types of frames - flat and spatial, just remember - if a car has a frame, then it will be able to endure serious loads, live a long time and it will be easier for it to overcome impassability.

Frame this car consists of two longitudinal spars located with some convergence, as well as three transverse beams.
Spars have a rather complex section. They are based on two 032 mm water pipes welded together, to which a box of two L-shaped bent steel sheets is also attached by welding from above. The height of the section of the spar ranges from 120 mm in the central part of the frame to 80 mm at the extremities.
The square cross beams are welded from 2 mm thick steel sheet, and the front beam also serves as a reserve tank for oil, so it has a drain and filler holes with plugs. In addition to the crossbars, two diaphragms bent from steel sheet give additional rigidity to the frame (front 2 mm thick, rear 1.6 mm).

Not very easy, right? The drawing will facilitate the perception of the "whole picture". The frame of this design is quite reliable.
The engine was taken from a VAZ-2101 car along with a gearbox. Air and oil filters somewhat redone. Of course, the "triple" motor will be somewhat better, and if you want to add power, you can install the motor from the "Niva", but that's another story.
transmission and chassis used from GAZ-69 with the use of individual parts from UAZ-469. In this car, a home-made cardan is also used - between the gearbox and the razdatka. Cardan half coupling and crosspiece - from GAZ-69.
Next are the springs. You can, of course, use springs from UAZ, but in this case, the car will turn out to be too hard. The rear leaf springs of the GAZ-24 Volga car are recommended for use, but even in this case the move will be somewhat harsh. To improve the softness of the move, home-made earrings were used - 20 mm longer than on the Volga - this size is not a panacea, it was obtained experimentally. So it has the right to life and independent selection - so you can achieve the desired softness. Also, shock absorbers from GAZ-24 are installed on the car. The springs are installed parallel to the frame spars, that is, at an angle to the axis of the machine.
Body. In the manufacture of the body of the SUV, sheet steel 1.0-1.2 mm was used. It is recommended to assemble the body from small, up to 1 m long, panels and connect them using spot welding. So body parts are easier to process and give them the desired shape.
You can make a body of fiberglass - by gluing. In any case, the authors of the project used material that was easier for them to work with.
Body work it was decided to start with the doors. Such a decision can also be put at the forefront. Those who already have some experience in auto construction know that making doors is one of the most difficult operations. Therefore, it is not surprising that many do-it-yourselfers tend to use ready-made doors from serial machines. But the overall design of the project often suffers from this. With serial doors it is difficult to achieve individuality of the exterior.
When bending, an electromagnetic plate was used.
For doors, sheet steel 1.4 mm thick was used, the rest of the body was assembled from panels 1.2 mm thick; except for the front fenders, which went millimeter steel.
A few words about security. Since the SUV was being built, safety elements were introduced into the design. Behind windshield a water pipe is welded along the perimeter, which, together with the front rack of the frame, performs the functions of a safety arc (in the event of a rollover of the machine).
Hinges and door locks are homemade, but you can use ready-made ones - from Zhiguli. Handles and glass lifting mechanism - from "Moskvich-2140".
Cabin windows are from VAZ-2121 Niva. To install them, a corner made of steel 1.2-2 mm thick was welded around the perimeter of the window under the rubber seal.
The hood is assembled from steel panels, covered around the perimeter by a frame made of a thin-walled pipe with a diameter of 16 mm. The hood leans forward on homemade horseshoe-shaped hinges.
Steering transferred from the GAZ-69, but the steering column angle had to be slightly reduced. Brake system used from GAZ-24. The headlights are installed from the Chezeta motorcycle (any similar in size will do, here you can turn on the fantasy).
Rear lights used from "Moskvich-2140", sidelights and direction indicators are homemade. instrument panel from GAZ-24, but the top panel of our own production is made of foam covered with fabric.
The gas tank is completely homemade. It consists of a 80-litre container welded from steel sheet, mounted on a frame between two rear cross beams.
The frame of the tent is welded from water pipes with a diameter of 25 mm. There are four thinner crossbars under the roof, three of which are removable. Plexiglas is glued into the windows of the awning. The method of attaching plexiglass to the tarpaulin proved to be very effective, so it can be recommended to all auto design enthusiasts. A pocket is sewn to the tarpaulin along the perimeter of the window, glass is inserted into it and the edges are impregnated with dichloroethane (or acetone) as shown in the figure. The tarpaulin is laid on a flat surface (for example, plywood), covered with plastic wrap and loaded - best of all with sand.
The front seats of the car are from the GAZ-24 with minor modifications. The rear ones are homemade.
Finished homemade jeep has a rather warlike appearance and, as tests have shown, excellent cross-country ability. On tests, the car showed better cross-country ability than the factory "Niva".
In the pickup version, the maximum load capacity of the machine is 800 kg. Jeep on gasoline A-92 or A-95 has a consumption of about 10 liters per 100 mm of run. Experimentally, the engine was redesigned for 76 gasoline - fuel consumption increased slightly.
www.4x4info.ru
What can be done from the UAZ with your own hands
(Homemade SUVs)
For those who are interested in homemade, UAZ, all-terrain vehicle, homemade:
They built this miracle of home-made technology in Dnepropetrovsk. The idea to create a car for outdoor activities was born by Alexander Novoseltsev quite a long time ago. And when an inexpensive UAZ fell into his hands, he served as an excellent donor for manufacturing.
Since, according to the idea, this car was supposed to be a two-seater off-road coupe, it was necessary to completely abandon the use of the huge body of the UAZ. As a result, only the frame and significantly upgraded suspension, brakes and steering elements remained from the donor car. Much was borrowed from the UAZ - PATRIOT. The rather low-speed native motor was replaced by a more torquey ZMZ-405 (16-valve). Was installed air filter from zero resistance, chiptuning of the control unit was made, the exhaust system was redone. As a result of these alterations, 170 hp were obtained. and 7000 revolutions on the shaft.
To overcome the fords was put snorkel.
Technical data UAZ-CRAB:
engine - ZMZ-405 power - 155 (passport) - 170 (after chip tuning) exhaust - self-made direct-flow drive on both sides - full gasoline- AI-95 consumption - 15-17 l/100km weight - 1600kg max speed - 160 km/h max fording depth - 1.2 m tires - 305/75/16 built in 2006
Provided that the gearbox and razdatka remained native, with "short" gears (4-speed synchronized) - the acceleration dynamics turned out to be not all-terrain at all ..! Maximum speed 160 km / h, then scary! Gas tank with a volume of 75 liters. shifted to the back for weight distribution, under the trunk, put the spare tire in the same place. The first sketches of the body were applied through tracing paper to the photos of the frame and aregates, we fought for a long time in Photoshop, but more modeled with our hands from cardboard and foam. For example, the hood in the throes of creativity was remade 3 times in metal! The roof and doorways were taken from Honda CR-X. All other body parts and plumage were made independently from sheet iron, puttied and painted. The entire construction process took place in a conventional garage and took 1.5 years. Even in the process of construction, the name CRAB stuck to the car because of the wide-spaced front wheels (305/75/16) of the optics and the bright red color of the body.
The idea justified the means. Created for outdoor activities, the car successfully takes part in rally raids, off-road competitions, auto exhibitions and just rides. For 3 years of operation, two checkpoints, one razdatka, front axle and broke the frame. The good news is that spare parts are available in the corners and villages. And all this is not comparable with the amount of adrenaline that is released when in contact with this growling gland. The plans are to "breed" CRABs, but already on more serious aregata, for example, from "PAJERO".
The CRAB was registered as a UAZ-469 with a redesigned body.
***** To see the photo UAZ - CRAB (there are many photos), click on the pictures:
You may also be interested in seeing the following articles:
Read more articles in the category: Homemade all-terrain vehicles and SUVs. All-terrain vehicles built by the skillful hands of do-it-yourselfersOr go to the section: Do-it-yourself all-terrain vehicles and tractors
autosam.expert-club.com
manufacturing features, drawings:: SYL.ru
It's no secret that on the territory of our vast country there are areas where it is absolutely impossible to move normally on the roads because of their poor quality. In this case, it comes to the rescue special machine which is characterized by high permeability. It's about an all-terrain vehicle. But, unfortunately, it is almost impossible to purchase such a vehicle that would be easy, economical and inexpensive. Therefore, many craftsmen with engineering and technical skills decide to create a caterpillar all-terrain vehicle with their own hands, taking into account their needs and capabilities.
How can tracked all-terrain vehicles be used?

Such homemade devices caterpillars come in different sizes and are used for a variety of purposes. With their help, heavy loads are moved, which are placed either in a body or in a special trailer. If an all-terrain vehicle is caterpillar, made by oneself, is used for a summer residence, then in this case various building materials are most often transported.
In addition, such a vehicle has transport versatility, and if any unforeseen circumstances arise, you can quickly, without any difficulties, get to a specific destination over rough terrain.
What to look for when creating a homemade all-terrain vehicle?

If you decide to make a caterpillar all-terrain vehicle with your own hands, you must clearly understand for what purpose it will be used. Be sure to consider the following points:
- weather conditions during operation.
- Dimensions. The width affects the cross-country ability of a caterpillar all-terrain vehicle, made by hand, the length is calculated from the number seats or the presence of a device luggage compartment, and the height should be optimal when creating the amphibious properties of the unit.
- Motor power. The more powerful the engine, the easier it is to overcome hard-to-reach sections of the road.
- Target. Depending on the purpose for which the mobile device is intended, its design may be modified.
- Number of wheels. Most often, a self-made caterpillar all-terrain vehicle, made by hand, has wheels from two to eight pairs, which are necessary to maintain the track.
Creating a drawing

The most crucial stage is the production of a sketch of a caterpillar all-terrain vehicle. Do-it-yourself drawings with the location of the mechanisms of the unit and its components are drawn after that. They must be very accurate. When creating such a vehicle, they usually use both home-made parts and finished factory-made elements. They are drawn separately, with the calculation of the compatibility and performance of parts and assemblies.
Design features

Tracked all-terrain vehicle, created by oneself, must have an engine. Basically, this element is taken from cars, most often domestic. You can also borrow it from a motorcycle. The undercarriage is represented by rubber tracks, tension system, suspension, rollers. For the manufacture of caterpillars are often used car tires. The base of the chassis consists of a tub, a frame or any other metal frame. For the control system, various components are taken or ready-made controls for motorcycles or cars, as well as tractors, are used. A self-made caterpillar all-terrain vehicle, made with your own hands, has a power system, which is presented fuel tank, petrol or diesel. Gas equipment is used much less often.
Manufacturing technology
Do-it-yourself light tracked all-terrain vehicles are made according to a certain technology. Their creation begins with the construction of the body, which must have high strength and complete water tightness. The foundation self-made transport must be rigid, so steel pipes are taken that can withstand any physical stress arising from movement. Then they begin to make caterpillars. To do this, take ordinary sheet rubber and create an annular rubber. Small aluminum blades are placed on its outer side with the help of rivets, and with inside set the necessary limiters, the step width of which is equal to the width of the rubber of the wheels.
The next step is that the bridges are removed from the car through the holes that were made specifically for this in the body. Rubber sleeves are used as protection. A rubber band is attached in such a way that the wheels are located directly in the center of the limiters. In addition, additional wheels are also fixed. They are necessary to keep the track in tension. At the end of the work in the cabin of the all-terrain vehicle, made by hand, heavy-duty glass is inserted.
Output
Thus, this vehicle is an indispensable means of transport in hard-to-reach areas where there are practically no roads. Possessing engineering and technical qualities, you can easily create caterpillar all-terrain vehicles with your own hands, the drawings of which will help to properly design such a unit.
www.syl.ru
Do-it-yourself jeep all-terrain vehicle, homemade all-terrain vehicles - For a car enthusiast - For a master - Let's do it yourself
Incredibly, you can make a real Jeep all-terrain vehicle out of an ordinary car. Don't believe? Read the article and see for yourself! The frame of the car consists of two longitudinal spars located with some convergence, and three transverse beams.Spars have a rather complex section. They are based on two 032 mm water pipes welded together, to which a box of two L-shaped bent steel sheets is also attached by welding from above. The height of the section of the spar ranges from 120 mm in the central part of the frame to 80 mm at the extremities. The square cross beams are welded from 2 mm thick steel sheet, and the front beam also serves as a reserve tank for oil, so it has a drain and filler holes with plugs. In addition to the crossbars, two diaphragms bent from steel sheet give additional rigidity to the frame (front 2 mm thick, rear 1.6 mm).
The engine was borrowed from the VAZ-2101 car along with the gearbox (however, on N. Yakovlev's car, the latter was taken from the VAZ-2103 - perhaps this is the only significant difference for jeeps). The air and oil filters have been slightly modified.
The transmission and chassis were used from the GAZ-69 with the use of individual parts from the UAZ-46E. One cardan - between the gearbox and transfer case- homemade. True, the cardan half-coupling and the cross in it are serial, from GAZ-69.
As the springs of both axles, the rear leaf springs of the GAZ-24 Volga car were used, however, to improve the softness of the ride, home-made earrings were used - 20 mm longer than on the Volga (the size was obtained experimentally). Shock absorbers - also from GAZ-24. The springs are installed parallel to the frame spars, that is, at an angle to the axis of the machine. However, this did not worsen their work at all.
The body is made of steel sheet with a thickness of 1.0-1.2 mm. Moreover, it all consists of relatively small (no more than 1 m long) panels interconnected by spot welded.
At first we tried to use fiberglass, but nothing worked for us. Then they opted for metal, - Nikolai Yakovlev recalls. However, this is quite understandable: Nikolai works as a welder, and, of course, this technology is well known to him. This should be borne in mind by every DIYer: it is very important to find “your” material.

We started to make a body from ... doors! - adds Vladimir Kapusto. Maybe this will come as a surprise to some. However, those who already have some experience in auto-design know that making doors is one of the most difficult operations. It is not surprising that many do-it-yourselfers tend to use ready-made doors from mass-produced machines. Unfortunately, such solutions sometimes run counter to the requirements of the overall design of the structure.
The most common operation in the construction of a hull is bending. It is not very convenient to carry it out in a vice, so Yakovlev and Kapusto equipped their garage with an electromagnetic stove: this significantly increased labor productivity.
For doors, sheet steel 1.4 mm thick was used, the rest of the body was assembled from panels 1.2 mm thick; except for the front fenders, which went millimeter steel. The punch was used very limitedly: mainly when fitting the windshield. The panels were joined using spot welding, for which a simple device was made from ordinary pliers, shown in the figure.
Behind the windshield, a water pipe is welded around the perimeter, which, together with the front rack of the frame, acts as a safety arc when the car rolls over.
Hinges and door locks are homemade, although it would be advisable to use ready-made ones - say, from a Zhiguli. The handles and the groaning lifting mechanism are from Moskvich-2140.
The cockpit windows are borrowed from the VAZ-2121 Niva car. To install them, the designers found a simple and effective solution: a corner made of steel 1.2-2 mm thick was welded around the perimeter of the window under the rubber seal. Knocking out the flanging would be much more difficult.
The bumpers were rolled from a 1.6 mm thick steel sheet, for which two shaped rollers had to be specially machined and an elementary rolling machine had to be built.

The hood is made of steel panels, covered around the perimeter by a frame made of thin-walled pipe Ø 16 mm. In front of the windshield, a thin foam pad is provided, behind which the wipers are removed. The hood leans forward on homemade horseshoe-shaped hinges. The latter are hinged on a U-shaped frame, which is also a radiator support.
The tailgate of the car also has a frame made of thin pipes; outside it is covered with a steel sheet 1.2 mm thick, and inside with hardboard.
The steering was taken from the GAZ-69, however, due to the layout features, the angle of the steering column had to be slightly reduced. Brake system - from GAZ-24. Headlights - motorcycle, from "Chezeta". Initially, all four headlights were located strictly horizontally, the car, as they say, did not look good. Then the inner pair was raised by 10 mm - and everything fell into place. The front of the car has acquired a completely finished look.
Rear lights from the "Moskvich-2140", sidelights and direction indicators are homemade. The instrument panel is from a GAZ-24, but the top panel of our own production is made of foam covered with fabric.
The car's gas tank is original. It consists of a 80-litre container welded from steel sheet, mounted on a frame between two rear cross beams.
The framework of an awning is welded from water pipes 0 25 mm. There are four thinner crossbars under the roof, three of which are removable. Plexiglas is glued into the windows of the awning. The method of attaching plexiglass to the tarpaulin proved to be very effective, so it can be recommended to all auto design enthusiasts. A pocket is sewn to the tarpaulin along the perimeter of the window, glass is inserted into it and the edges are impregnated with dichloroethane (or acetone) as shown in the figure. The tarpaulin is laid on a flat surface (for example, plywood), covered with plastic wrap and loaded - best of all with sand.
The front seats of the car from the GAZ-24 Volga car are slightly redone. The rear ones are self-made, it is planned to modify them so that when the car is converted into a pickup truck, they turn into the back wall of the cab.

In conclusion, briefly about the operational data. Perhaps the main advantage of the jeep is its excellent cross-country ability. Last winter, during one of their fishing trips, Nikolai and Vladimir got into a heavy snowfall, whole drifts of snow grew on top of the ice. But this obstacle turned out to be nothing for home-made cars, while the Niva, which was nearby, had to wait for help.
In the pickup version, the maximum load capacity (when rear springs become horizontal) of the machine is 800 kg. V. Kapusto's car runs on AI-93 gasoline, and its fuel consumption is about 10 liters per 100 mm of run. At N. Yakovlev's jeep, the engine was converted to A-76 gasoline; fuel consumption is somewhat higher.
Try, dare, and the jeep all-terrain vehicle will be yours!
Pan-As site, homemade site - the site has everything that you can do with your own hands: crafts, homemade products, decorations, children's crafts. Make them yourself, with your own hands and get real pleasure from it.
Related content:
www.pan-as.ru