Replacing glass headlas - a frequent and completely simple procedure, which even newcomers are carried out. This article will show how to replace the glass of the VAZ 2110 headlights and the VAZ 2114 quickly and without any problems.
First you need to find out how to disassemble the flashlight to change the glass.
What is the replacement of glass lantern
We'll figure it out for a start, and for what you need at all the replacement of glass headlights VAZ 2110 or 2114:
- Everything is simple - glass separately is cheap and it is not necessary to buy expensive headlats entirely. The reason for which is needed, becomes some pebble in the glass or another foreign object.
When the glass lantern cracks, the light from the headlights becomes dim. - In addition, the glass headlights of VAZ 2114 or VAZ 2110 can over time to sweat and then again, by the way, there will be only a replacement. Polishing in this case rarely helps, and this process is not so light.
It's easier to buy glass headlats and replace it quickly. - It is easier to buy lights in the analysis on the "flea markets". There you can find the desired glass and buy very cheap.
Headlight itself is worth about 5,000 rubles each. Why, asks, buy an expensive accessory, if you can just replace the glass?
With the problems of the lanterns, every motorist faces sooner or later. And comes as it is more profitable.
If the headlight came into disrepair, then it can be changed and assembled. To do this, you will just buy a new model, sealant, film.
Then dismantle the old headlight, apply a sealant to a new flashlight, and after calmly stick it into place. In the process, you need to ensure that dust or dirt do not fall between connections.
How to replace glass headlights
Now we learn how to replace the glass itself. First we learn the design of the lantern, then what it consists of.
What is the headlight
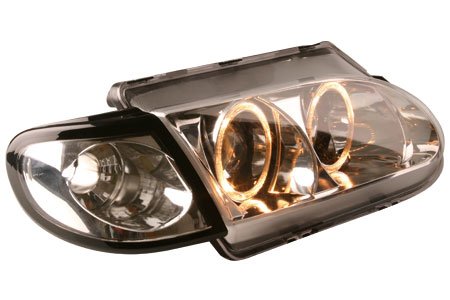
As you know, the main link of any lantern is its reflector or reflector. It is a concave mirror component, which serves to form a light beam of the desired form.
Types of lamps for lanterns
As for the light source, they are automotive lamps. They can also be different.
To date, known:
- conventional incandescent lamps;
- halogen lamps;
- xenon lamps.
An ordinary incandescent lamp is a sealed flask with vacuum or inert gas. Inside the lamp is a tungsten spiral, which under the action of electric current is rolled to a temperature of 2600-3000 k, thus radiating light and heat.
With regard to the efficiency of such lamps, it is about 3400 K.
Halogen incandescent lamp is similar to the principle of action with a conventional incandescent lamp. It contains such a lamp as part of minor halogen additives, such as bromine, chlorine, etc.
With the help of these substances and dimming the flasks and glass headlights. According to experts, the use of halogen headlights on the car headlights increases the term of their service twice and prevents the quick failure of the flask.
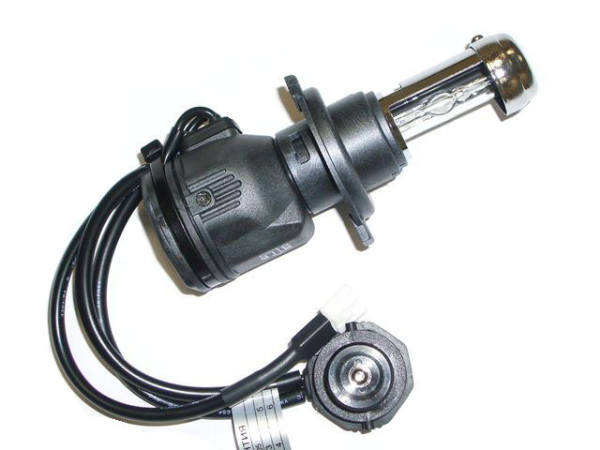
Finally, the xenon lamp is a gas tracker, which contains in its xenon. Such lamps are also called HID lamps and the radiation spectrum is identical to the emission of daylight sunlight.
There is such a lamp of two flasks and quartz glass. Consumes such a lamp of only 35 W electrical power, instead of 55 W at the halogenki.
Glass of lantern
The headlight consists of a corrugated glass, which will be discussed in this article. The most popular species of glasses are transparent.
Although the fashion now, more and more.
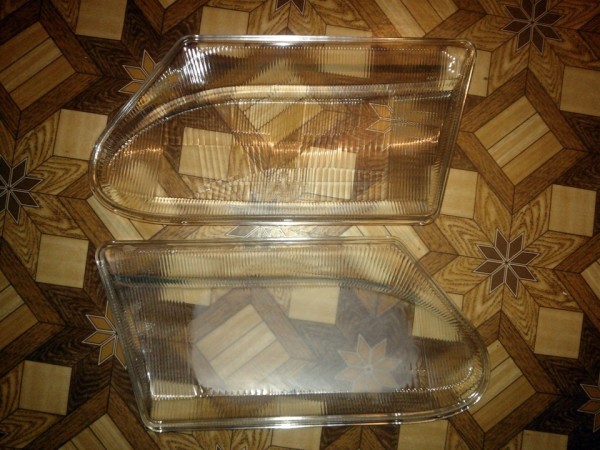
Although still known and reflex variants, crystal, modular, linous, etc.
How to replace the glass on the spotlight

As it turned out, this is quite simple. But there are two ways.
The first method presented below implies rapid removal of glass and its replacement. The second way is a complete headlight analysis, which allows you to change not only glass, but also other parts.
Fashion first
Begin:
- remove the radiator grille;
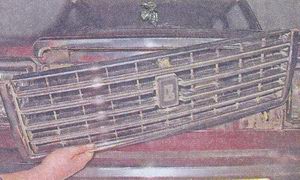
- we raise it and put in the resulting gap between the bumper and the grille fingers;
- we find two latches on each side and disclaim them;
- we take out the lattice;
- now we find two bumper fastening bolts and unscrew them;
- i pull the bumper on yourself (it does not hold anything and it should easily go out);
- we find three bolts fixing the headlight and unscrew them;
- faro blend inside;
- having been following the headlights, tighten it to the center of the car;
![]()
- we take a screwdriver and picing her cilia from the outside, smear the headlight from the jap with the bumper;
- remove it;
- now it will be necessary to unscrew the lower headlight fastening nut;
- then we post the connectors from the headlight, turn signals and the cylinder of the hydrocorographic;
- i remove the headlight completely.
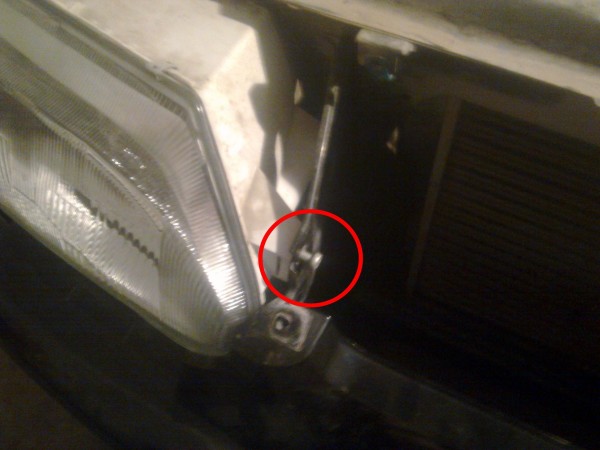
Note. If the headlight does not come out, it is possible, it is kept brackets on the sides that should be picked up the screwdriver and the headlight will easily come out.
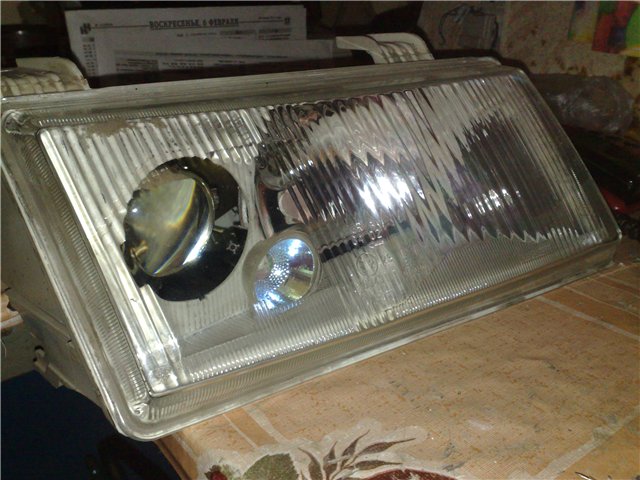
The headlight is removed and now you will need to remove the glass, blow the reflectors from dust and correct the rubber gasket.
Mount new glass. We collect everything in the reverse order.
Note. Installing brackets to the place will be much easier, if you first hook it for the headlight housing, and then put on top and snap on the glass.
- we install the cilia in place, pushing her edge into place with a screwdriver.
Method of the second
It is time to find out how to change the glass on the VAZ 2110 headlight using the second method. And for one you can spend full.
Let's proceed:
- disconnect pads with wires;
- remove the top grid of the radiator (you will need to unscrew several bolts by 10);
- disconnecting the pads with wires, remove the hydrocormer (for this, press the latch and turn the hydrocormer to be 90 degrees clockwise);
- we find bolts that fix the headlight by the key to 10;
- move the headlight a little back;
- we move the ciliary to the center for 4 centimeters;
- we derive its edge from the engagement using a screwdriver;
- weakening the tightening of the bolts fixing the upper buffer;
- remove the cilia by clicking on the lower part of the lining so that its flange is out of engagement with the front buffer;
- take the key to 10 and turn the last nut, fixing the item;
- remove the lantern.
- we take a flat screwdriver or knife;
- insert the tool into the angle and slightly lifted;
- take the stationery knife and cut off the old sealant.
Council. Slicing the old sealant with a knife, you need to raise the angle of glass with a second hand. If the sealant is not cut, then you need to take an industrial hairdryer and heat the connections to the desired temperature. The sealant melts a bit and it will be easier to cut it.

It will be useful to see this video
We continue:
- after the glass is removed, it can be replaced with a new one.
If you need to change some other part of the headlight, then we continue the analysis:
- we dismantle the headlight reflector, by unscrewing three bolts;
- now it will be necessary to remove the board with the reflector and the module from the headlight.
Note. In order to remove the board without any problems, it will be necessary to remove the clamping spring through the hydrocarodent hole. After that, the adjustment is maximized, and then unscrew the adjustment screw first and then different.
- the board is removed from the headlight.
Note. It is worth noting that the headlights are two species. And the analysis of both is noticeably different from each other.
The instructions described above shows how to disassemble the headlights of Kirzhach.
Now we learn how to disassemble the headlights Bosch, what to do is much easier:
- remove the glass from the lantern (it will be released only after the latches will dismissed);
- unscrew the adjusting bolts of the headlight reflector completely;
- pull out the cap inside the reflector, which closes the near-light lamp (for this again we use a screwdriver, which we upgrade the reflector on the other side);
- we change what you need, and collect the item in the reverse order.
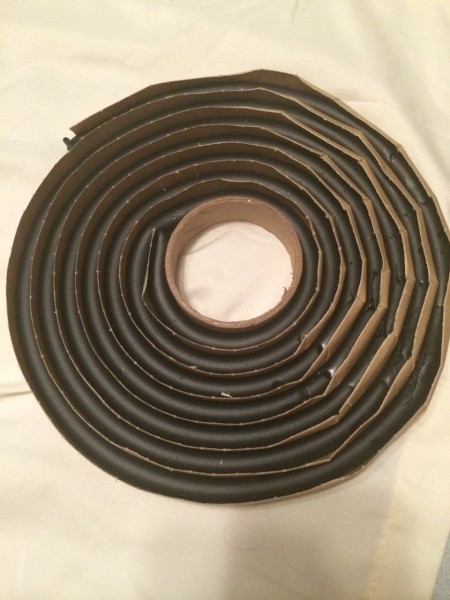
Note. When assembling headlamps, after replacing the glass or another part, instead of the sealant, you can use a soft rubber seal (it is shown in the photo below).
That's all. Do with your own hands, it turns out, much can be done.
It is necessary to do everything as it recommends that the instruction is recommended not to make any errors. Having learned to change the glass on the VAZ 210 and 2114, you can do it on the VAZ 2115 and on the VAZ 2112.


