The most common reason for replacing the radiator of the VAZ 2110 heater is the flow of coolant (toosol). Of course, the reason for the name of the situation can be not only punched or the protruded radiator, but also a fragile fastening of hoses.
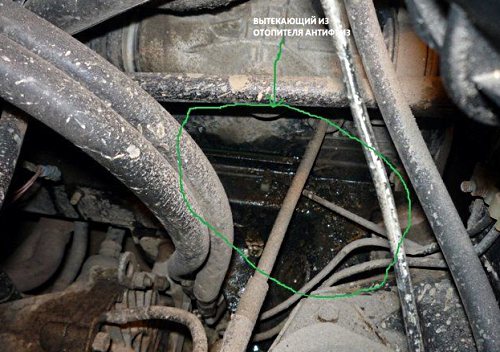
However, since without parsing a motor shield, it is not possible to determine any one nor the second problem, the heating radiator is better to change in any case. Moreover, this is done for everyone, the main thing is not to retreat from the correct sequence of actions, quite detailed in the manual for the operation and repair of cars VAZ 2110, 2111, 2112. This sequence is now present. But immediately I would like to emphasize your attention on the fact that:
- in the cabin no action will not have to carry out, everything is done in the subcontrol space;
- the heating radiators themselves may relate to old samples (released until September 2003) and new (released after September 2003), which are fixed in different ways, and therefore, the process of their replacement will have some features.
What do you need from the details and tools?
- Crosshead screwdriver.
- Clamps, 4 pcs. or more.
- Tweezers.
- Tosola drain container.
- Directly radiator.
Step-by-step instruction.
Replacing the radiator of the heater of the VAZ 2110 of the old sample.
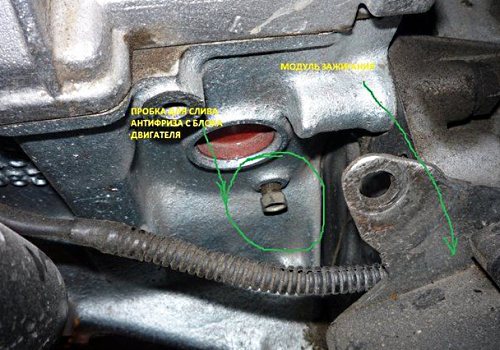
1. Drain in the prepared pre-container part of the coolant available in the system. It is possible to do this through the expansion tank (there is about 1 liter somewhere) either through the drain hole in the engine block (there will be about 4 liters).
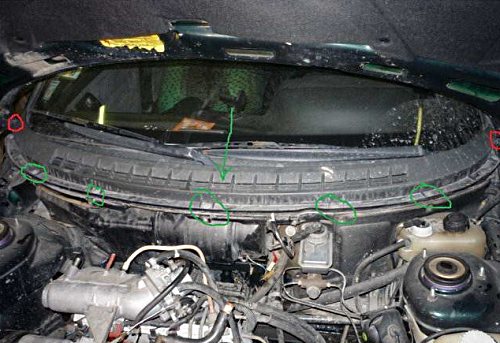
2. Remove the wind cover seal, and after the lining itself (jab): First, unscrew the screw of its fastening under the main brake cylinder, then 4 upper locks in its right part, after disconnect 2 clamps, holding hoses and wires, including and The minus wire of the fan, coming from the body, as well as the plus terminal, well, and turn out the 2 screws of the fastening of the left part of the jab, but so that the latter is only moved, but not shot.

3. Remove the windshield overlay, unscrewing 2 nuts and 5 screws.
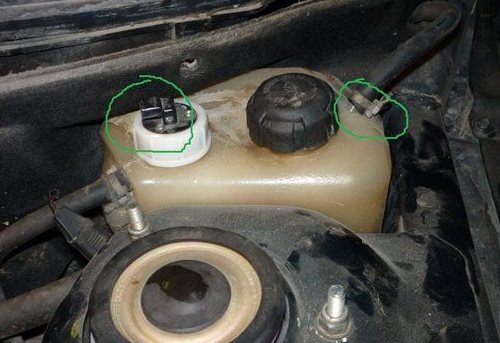
4. Disconnect the Tosol level sensor terminal in the system and remove the hose from the expansion tank.
5. Disconnect the windshield washer hose. Unscrew the 4 screws that are in front of you, and dismantle wipers, windshield lining, clips (partially) heater housing, fan.

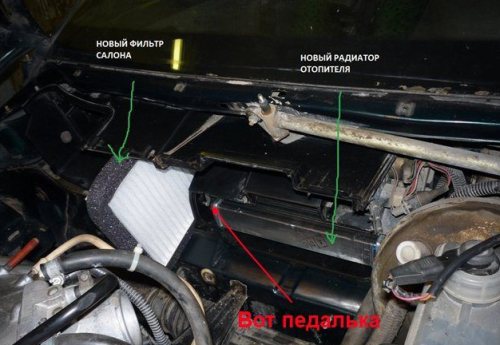
6. Unscrew the screws fixing the cabin filter and the front of the fan (be sure to remember the location of the four longest). Remove the last together with the fan.
9. Remove the cabin filter housing, fan (rear part), feed hoses, removal and coolant.
![]()
10. Remove by attaching a slight effort, dried heating radiator. Install the new ones in its place, and then return to the desired places all the details removed only in the reverse order. At the same time, pay special attention to the correct installation of the plastic fan case - the pedal must be hit in the desired groove, as well as that after the assembly you should not have "extra" bolts, since if you do not provide the density of the adjunct of all heating nodes Systems, your stove simply will not work (warm).
Video (old sample).
Replacing the radiator of the heater of the VAZ 2110 of the new sample.
1. Remove 1 screw in the middle of the bottom end of the windshield, 2 nuts over the intake manifold and 1 nut in the left corner, close to the air filter.
2. Remove the rear window washer tank (if any) and air filter, twisting pre-4 self-pressing, holding the plastic lid, which presses it to the heater.
3. Look through the air supply hose (it lies with the letter "g"), find a large self-tapping screw and 2 smaller screws connecting 2 parts (in the heaters of a new sample that is so much) of the heating radiator, and unscrew them.
4. Maximize the right-hand of the heater to the right, and with the left follow as follows: holding its left part in the left hand, and the right - right, turn the last slightly from yourself and up. Out off first the right side, and then the rest is already.
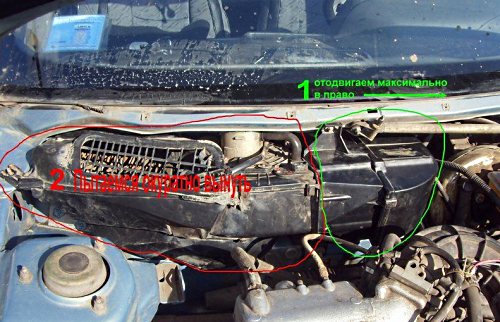
5. Remove the right-hand side. Through the free space on the right side of the shield noise insulation, remove the vapor hose.
6. Remove iron brackets that bonded 2 sides with the right side of the heating radiator. Having access to the flap, also change it to the new one.
7. Install everything in the reverse order.


