Each car owner comes such a moment when a buzz or screech is coming from under the hood during a working power plant.
The cause of this phenomenon, as a rule, is wear bearing. Most often, this problem occurs with a tensioner or generator.
High speeds of rotation and load lead to the wear of these components.
Elimination of increased noise from under the hood is reduced to replacing worn elements.
But at first it is necessary to figure out, the bearings of which element create noise and require replacement.
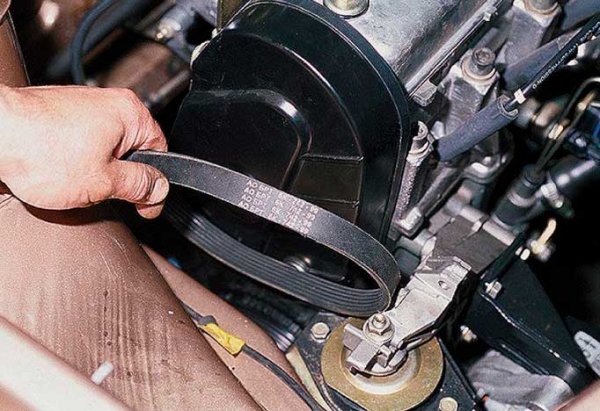
Make a check will not work, it is necessary to simply send the tension of the generator belt, the belt to remove and start the engine. If noise after removing the generator drive stops, it means that it is time to change bearings.
Signs of malfunction
The main feature of the wear of the generator bearings is the appearance of a distinct noise when rotating the rotor.
Typically, bearings begin to make noise due to insufficient amount of lubrication, mechanical damage (destruction of the separator, strong wear of the tracks) or due to the turn of the external closure in its landing place, although it happens very rarely.
It is believed that in the absence of lubricant, it is enough to lay a new one to get rid of the problem.
But this is not always the case, the operation of this element without lubrication is accompanied by intense wear, so after booking a new lubricant, noise may stop, but not long, the bearing will fail very quickly.
In any case, when problems with the generator bearings are detected, it is better to replace them right away.
The design of the generators is almost the same, so the sequence of work will be similar for both the generators of other cars.
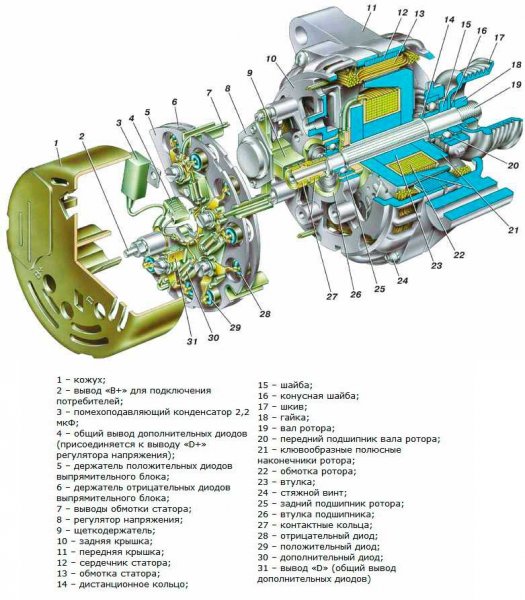
What bearings are needed?
Before starting work, you need to buy new bearings. In general, the manufacturer recommends changing the front bearing (the one that from the pulley side) along with the lid. But in this case, the cost of repair will increase, and significantly.
It will be cheaper simply replacing the components without a lid. Going into the auto shop must be remembered or record the dimensions of the elements that will be needed.
It is important to note that at earlier VAZ-2110 models in the generator installed bearings with numbers: front - 6302, rear - 6202.
On more modern VAZ-2110, bearings were already used in the generator: front - 6303, rear - 3203.
Front bearing.
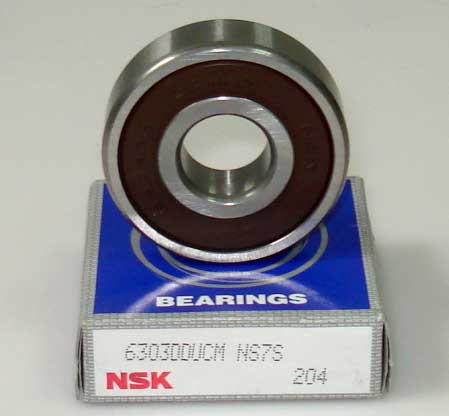
Set: front and rear bearings.
![]()
Required tool
After purchasing new elements, you can proceed to work, but for their implementation, such tools, devices and materials will be needed:
- Keys horn and cape (8, 10, 13, 27);
- Screwdrivers flat and crusades;
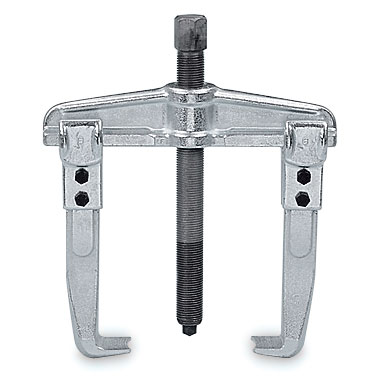
- Universal puller;
- Marker;
- WD-40;
- Winds;
- Vice;
- A hammer.
Disassembly, replacement
Prepare everything you need can be started. The sequence of actions is as follows:
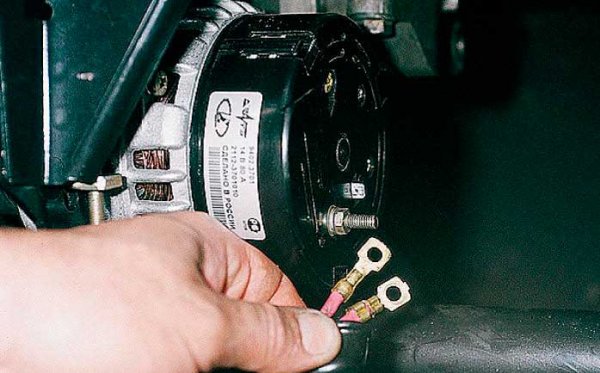
- We put the VAZ-2110 in the garage or on the platform. Disconnect the "minus" terminal with the battery. From the generator, disconnect all the wiring.
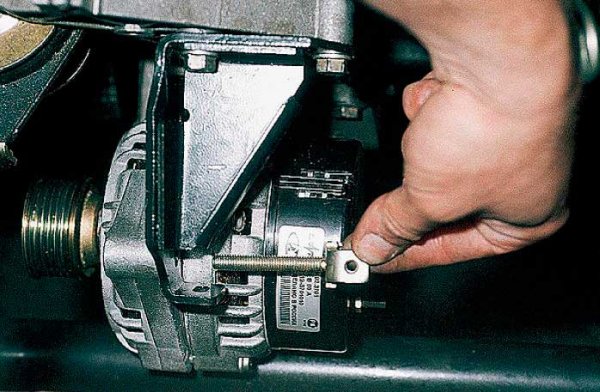
- We turn around the locking nut and the adjusting screw, we completely simply simp on the motor in the direction of the motor and remove its belt.
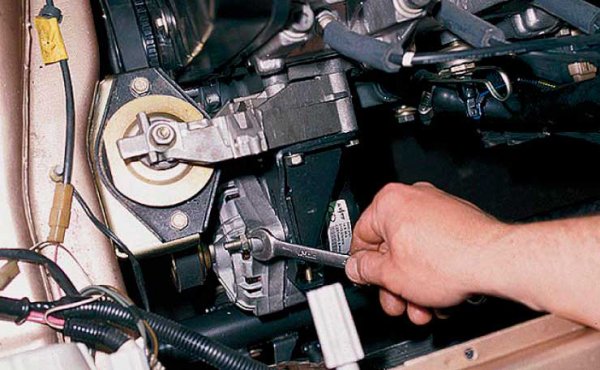
We unscrew the mounting bolts of the adjustment bar and remove it.
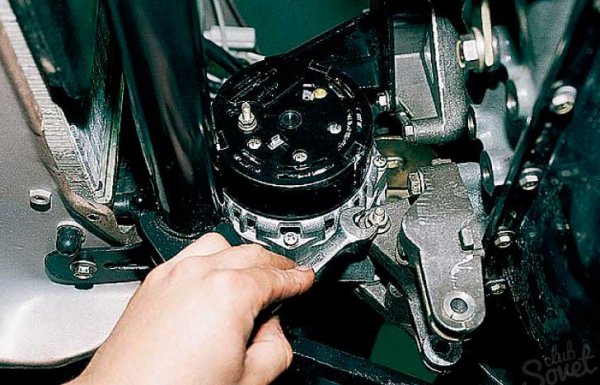
- We climb under the car. We dismantle the front part of the crankcase protection with the auto, we unscrew the lower fastening nut of the generator, remove the bolt and pull out the generator.
 All subsequent work is performed on the generator removed.
- Remove the pulley fastening nut. You can do this in several ways. The first one is if a hole under the hexagon is done in the rotor shaft. With the help of a hex manner, we hold the shaft, and we turn off the nut with a cape key.
 If this way it did not work out to send a pulley mount, we use the second method. It reduces to fixing the rotor using a screwdriver. It is installed in the slits made in the rotor through the ventilation holes.
 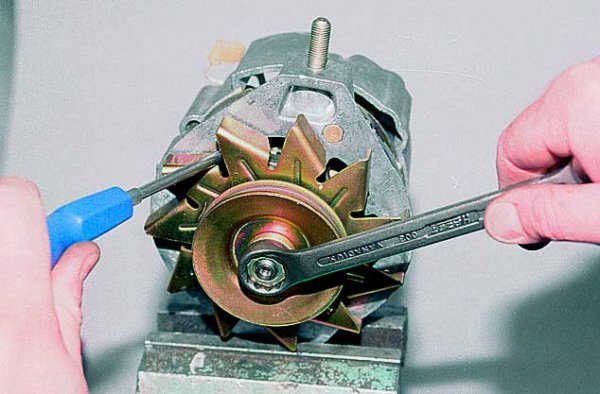 Fixing the rotor, turn the key to the nut. If it was not possible to unscrew it in such a way, while we leave attempts and go to further work.
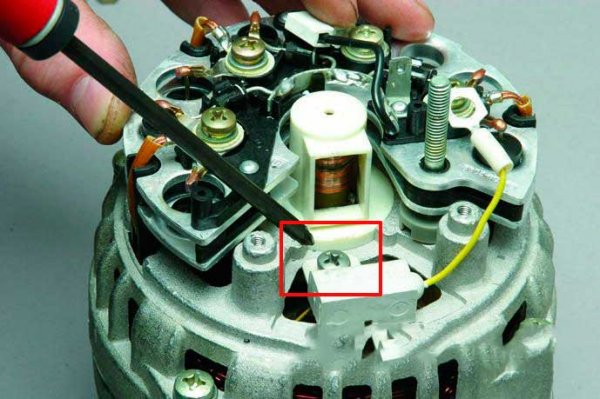
 - Removes the protective casing mounted on the back of the generator. To do this, pull the three latches and carefully remove the case.
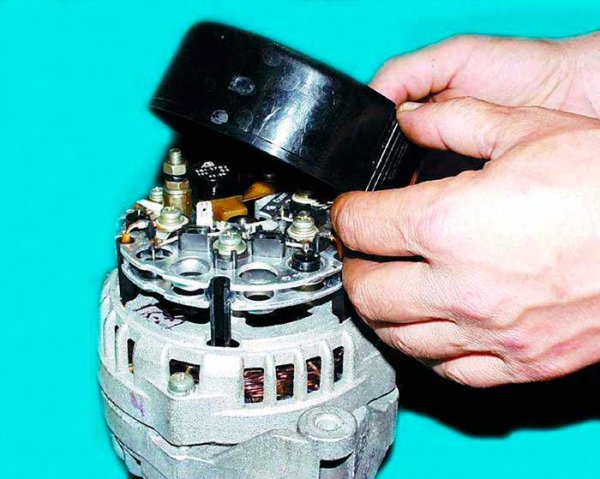
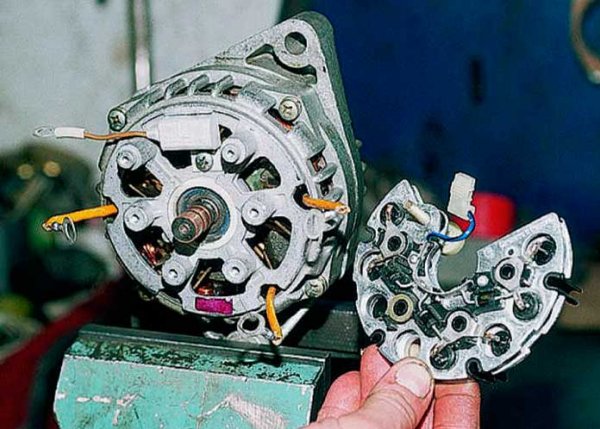
- In order to do not damage the elements of the generator during further work, installed in the back (brush, regulator, diode bridge, capacitor) better remove them by unscrewing their fastening bolts.
- Remove the back cover. It is attached to the front with 4 bolts. In some models, the bolts head are made under the end key to 8, others have under a crusade.
 Pre-these bolts fill WD-40, as they often zak. Also apply a marker marker of the back cover to the front. You can do it in advance.
 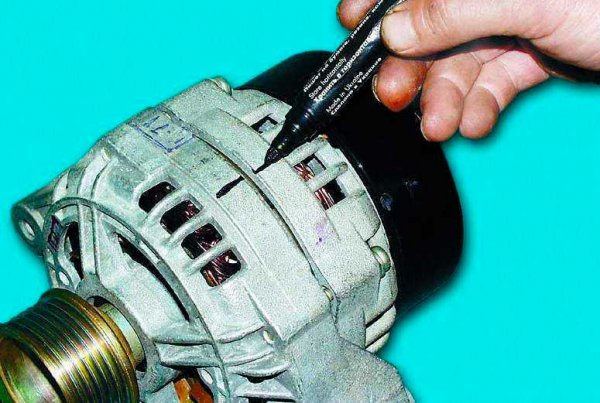 Having twisted the bolts with a screwdriver gently press the back cover and remove it. In this case, the rear bearing should remain on the shaft.
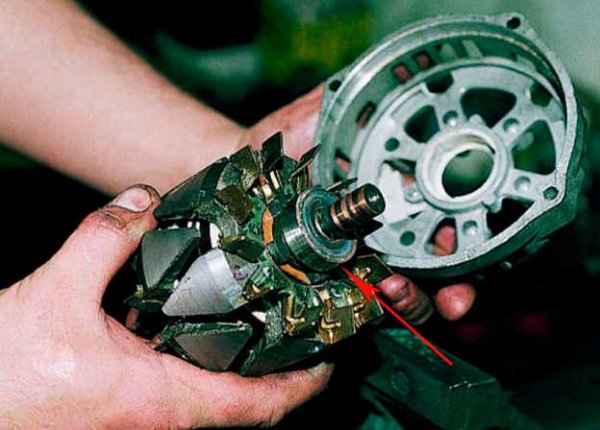
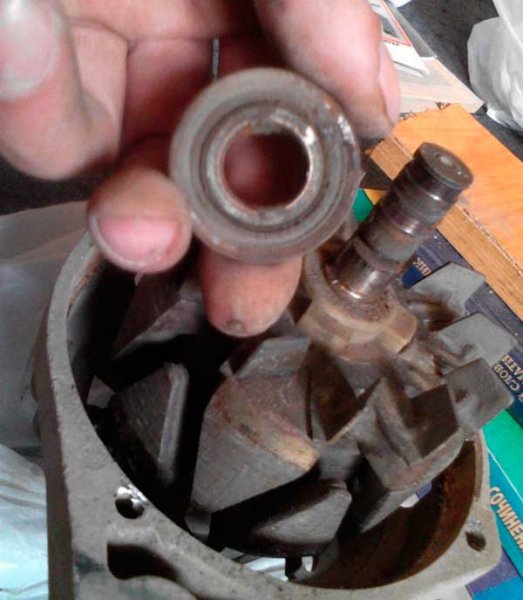
- If it was not possible to remove the pulley before that, after dismantling the back cover, you can do it by holding the rotor in the vice. If the pulley is removed earlier, knock the rotor from the front cover. To do this, we roll the nut on the tree thread, keep the generator the front cover, we hit the shaft with a nut on a wooden stand - the rotor should exit from the front bearing. We unscrew the nut and fully remove the rotor.
- Knock the bearing with the front cover. To do this, use the suitable cutting pipe or head to 27 from the key set.
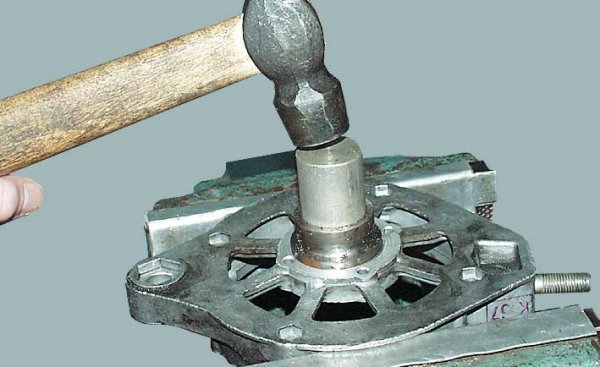 Or with a pipe with a suitable diameter.
 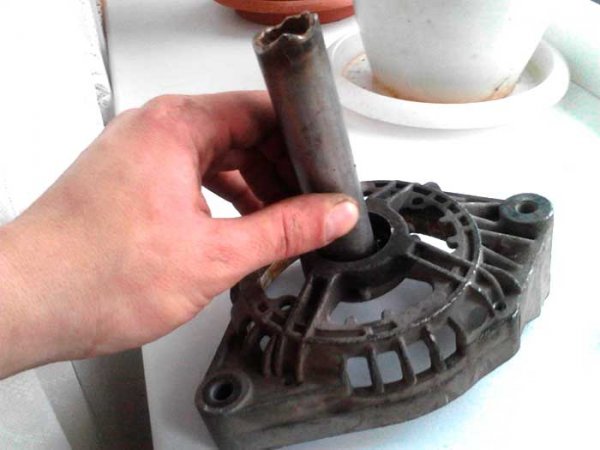 If you purchased a lid with a bearing, it will be much easier.
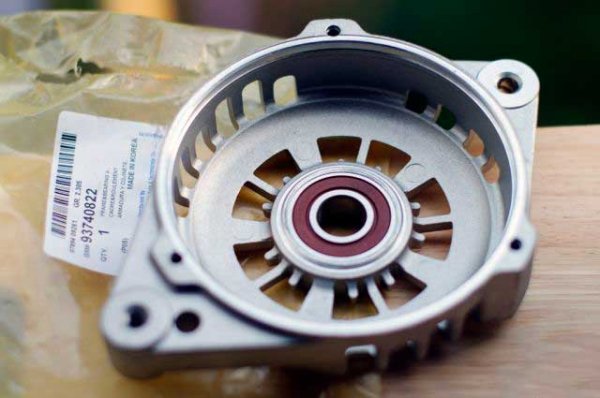
- The new bearing is lubricating and clogged into the landing place with the help of the old one. The old bearing is used as an outset, it is applied by a hammer strikes until the new element is completely in place.
 After that, we ruin the edges of the lid to fix the bearing in it.
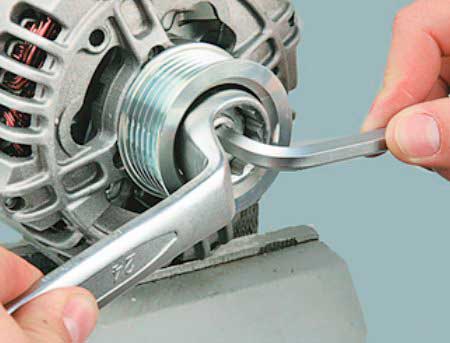
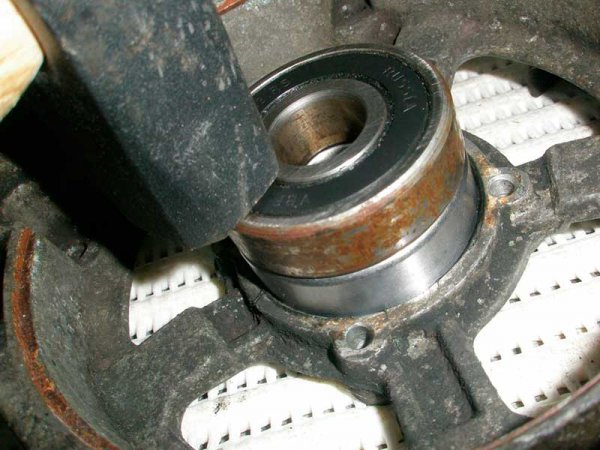
- Remove the rear bearing with the shaft. To do this, use the puller.
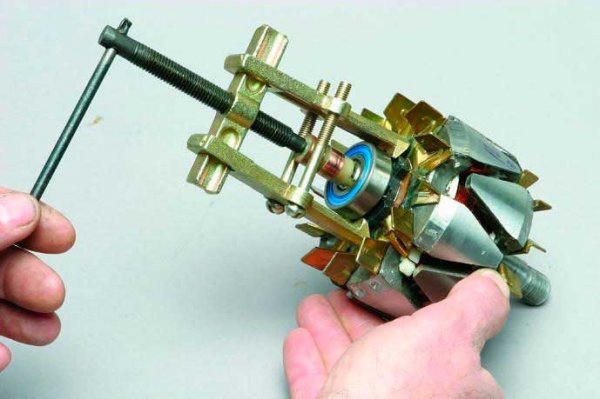 If there is no such, you can use the usual horned large key key. One sponge of the key we get under the bearing, the rotor will play the role of stop. We use the key as a lever, inflicting a hammer on it. The key must be moved in a circle so that when removing it does not go to the skew.
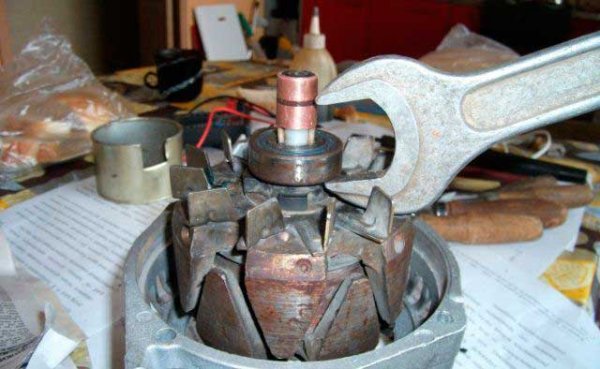
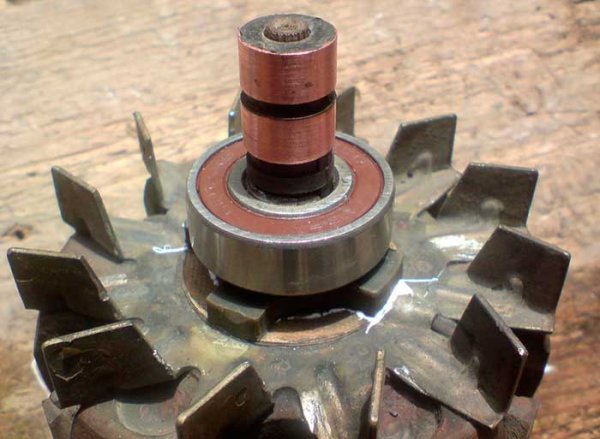
- After removing or knocking down the rear bearing, we install a new one in its place. Put it to the location of the handset from the tube or the end key. It is important that when boarding the diameter of the tube or key, it was equal to the diameter of the inner bearing rope.
- Before assembly, once again, we qualitatively scour new bearings.
Assembly
The generator assembly is performed in the reverse order. First install the rotor into the front cover. Since it will go tight in the bearing, it can be scored, but only through a wooden spacer.
Then put the back cover in place, it will also have to be stuffed, and also through a wallpapers.
We are tightened by both generator covers with bolts, after setting the back cover by tags.
We set the removed elements (regulator, diode brush, brushes, etc.) and fix them.
With strong wear, the brushes are better to immediately replace them, so that in a small gap did not have to go to the generator again to replace them. We put in place a protective casing.
We set the assembled generator on the car, fix the fasteners, connect the wiring, check the performance.
If all work is done correctly, it will work silently.
All replacement work takes no more than 2 hours and allow you to fully restore the generator performance.
If the article has a video and it does not play, highlight any word with the mouse, press Ctrl + Enter, enter any word in the window that appears and click "Send". Thank you.
It can be useful.


