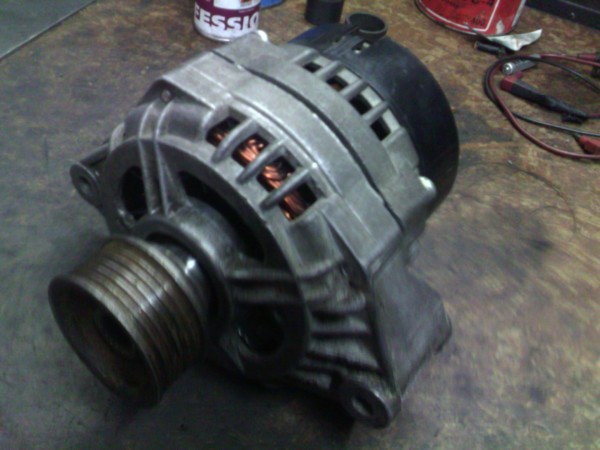
Replacing the slip rings of the VAZ 2110 generator is necessary if there are defects of various kinds on their surface. Because of them, the rings cannot perform their most important function qualitatively - to tightly connect the parts to each other so that contact occurs between them.
Very often, individual parts of the generator break. If you change it completely, you will have to spend a rather large amount of money.
Therefore, you can repair it by replacing the broken parts. On the VAZ 2110, replacing the alternator slip rings is a simple procedure and you can handle it yourself.
Steel rings and their advantages
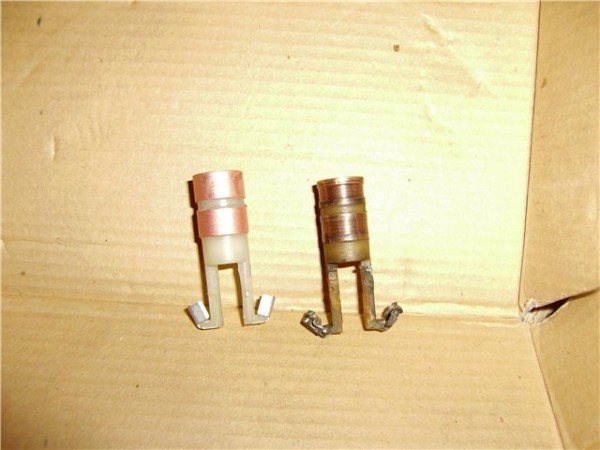
It makes no sense to install copper rings, as they wear off very quickly.
Therefore, it is better to stop your choice on steel rings, which have a number of advantages:
- They hardly wear out, so the brushes remain in almost perfect condition for a long time.
- They are easy to install.
Note: by the way, for a more reliable fixation, they are pre-lubricated with a flux solution, and then washed with soda.
- Once installed, they are securely fixed, remaining motionless in all situations.
Replacing the rotor with rings
Sometimes it is not possible to replace the rings separately. The rotor also has to be changed. This situation is observed when the rings reliably "stick" to the rotor.
But you can try to restore the rings by placing them in a sulfuric acid solution. It is impossible to keep them in solution for a long time, since the disintegration of whole particles can occur.
To replace the rotor and rings, you must:
- Put designations on the generator covers (so that later it would be easier to assemble them, otherwise you can confuse their location).
- Remove the plastic cover. This is easier to do after the three latches securing it have been folded back.
Note: you need to unbend them very carefully, as they are quite delicate. Moving too fast can cause them to break.
- Unscrew the two screws that secure the electronic voltage regulator.
- After that, access to. It must be removed, otherwise it will interfere with the work process.
- Remove all fasteners from the block and condenser.
- Then unhook the three winding lugs from the stator.
- Remove the block and condenser. If you need to replace the capacitor, you must unscrew the nut that secures it. Then remove the washer with the bushing.
Now it's the turn of the wire that secures the capacitor to the contact bolt. After that, it will be possible to remove and replace the capacitor itself. - Remove the alternator tightening bolts. There are four of them.
There are usually flat washers and spring washers under the screw heads. They are very small, but they serve an important function.
They cannot be lost, otherwise you will have to buy new ones, but it is not easy to find them on sale. - Remove the generator cover from the side where the slip rings are located. In this case, you can slightly help with a screwdriver, as if pulling the cover towards you.
- Remove the nut securing. Remove the washer and pulley.
Note: the rotor must be stationary in this case. So that it does not spin, it should be clamped as much as possible, and a small piece of plywood should be placed under it.
- Detach the thrust washer.
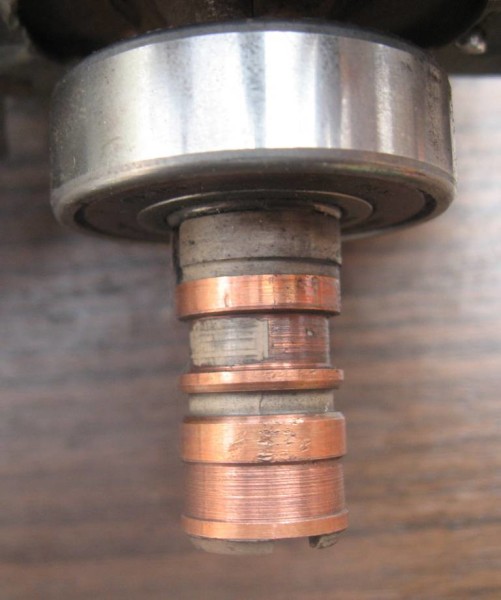
- Remove the generator rotor.
- It has a spacer ring that needs to be removed.
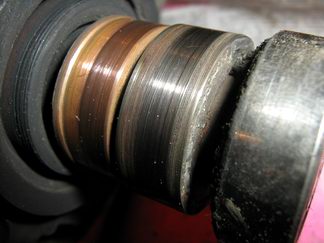
- At this stage, you need to carefully inspect the slip rings. It is possible that they will also need to be replaced.
If they are worn out or there are scratches on their surface, then replacement cannot be avoided (by the way, it is not necessary to put new rings - they can be carefully polished). - A multimeter should measure the resistance of the rotor winding.
Note: if this tool shows that there is a break in the rotor winding, then it must be urgently replaced. You can also try to rewind it by eliminating the break. But the process is quite complex.
- You should also check for a short circuit between the winding and the rotor housing. To do this, you need to use a 220 V lamp.
One of its wires must be connected to the body, and the other must be connected in turn to each of the. In this case, if there are no short circuits, then the lamp will not light. - Replace the new rotor.
- Collect everything in the opposite order.
Which leads to the erasure of the rings
The following parts of the generator can lead to failure of the slip rings.
Stator
- On its inner side, there should be no traces from the rotor, which would appear during its operation. Otherwise, you will have to change it.
Note: Bearings should be checked as well, as this problem often appears when they are broken.
Sometimes even the generator cover can be broken as well. This problem urgently needs to be eliminated by replacing the damaged part with a new one.
- After that, you should check if there is an open circuit in the stator winding. You need to check it in the same way as the rotor.
Of course, if there is confidence that the stator is fully functional, then such manipulation is not worth it. But if there is even the slightest suspicion of its malfunction, then it is better to check it.
A defective stator can lead to rotor failure again.
Bearing
- See if the one on the rotor rotates correctly. It should rotate freely on the side of the slip rings, without jamming.
- If it dangles too much or, on the contrary, is very tightly clamped, then it must be compressed.
Lid
- The cover of the generator on the side of the slip rings may be damaged, cracked or other defects.
- In this case, you need to replace it, otherwise it will have a bad effect on the slip rings, leading to their erasure.
Replacing slip rings without changing the rotor
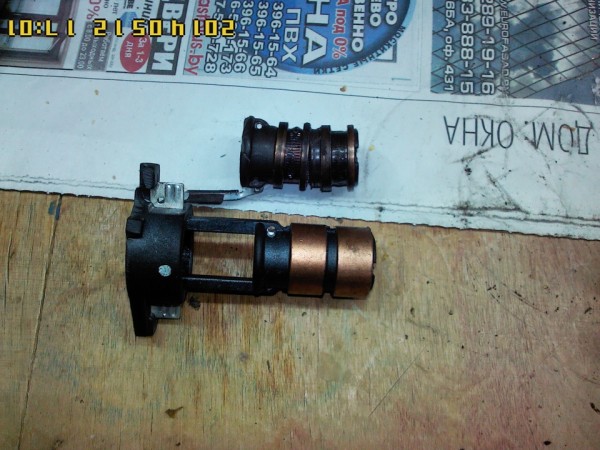
In any case, their replacement is carried out with the removal of the rotor. But not always it also needs to be changed.
The replacement of the rings is as follows:
- Use a screwdriver to pry off the plastic casing that "hides" the contact output of the rotor winding. After that, it should be removed.
Note: you need to pry gently, in a circle, until a slightly noticeable gap appears.
- Under it you can see two contacts.
- Using pliers and a screwdriver, release the latches. After that, release the rotor winding leads.
- Disconnect the ring shank. You can perform this process in any convenient way.
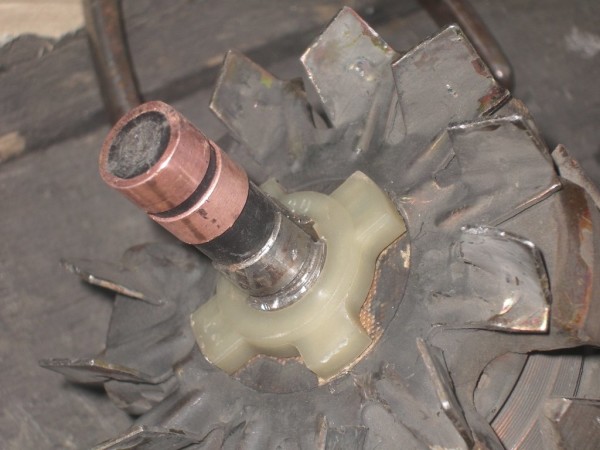
The easiest way is to pinch the shank and twist it. The contacts will be cut off and it will be possible to remove it without any problems. - Contacts may remain in the grooves. They should be picked out. You can use a regular nail for this.
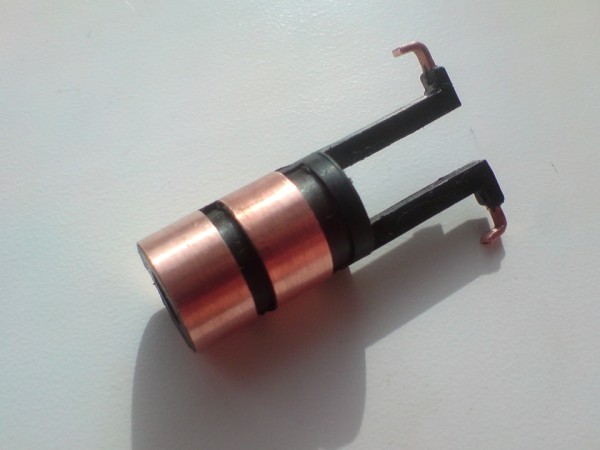
- Put new rings on the rotor shank.
Note: this must not be allowed to skew. Everything should be strictly in the center. Otherwise, there will be beating, causing the brushes to suffer.
- The shank must be driven in with a light hammer. In this case, the rings must not be hooked, otherwise they may split.
- Bend the contacts back.
- Replace the cover.
- Check if the generator is working properly.
You can replace the generator rings with your own hands, since it is not difficult to do this even at home. The price for new rings ranges from 200-1000 rubles.
And in a car service you will need to pay two, or even three times more. After all, no one will undertake this seemingly simple repair for less than 1000 rubles.
Of course, before proceeding with self-repair, it is worth reviewing photos and videos on this topic. The instruction also does not hurt.


