Good day, dear autmobilists! \u003d) Today I will tell you how to independently disassemble the optics of the car to install various devices without damaging it at the same time.
So, in order to do something, I will bring ultimate clarity
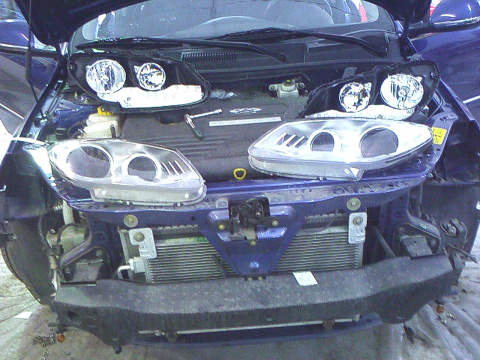
1. To dismantle / mount headlamps in most cases, you have to remove the bumper. As on each individual car, you will not tell the bumper. I just say that for most cars this operation is standard. You can not remove the bumper completely. To do this, unscrew the mounts on top of the front (usually under the decorative grid of the radiator), from the sides (under the lockers there are fasteners, they fasten the bumper to the wings). After dismantling these mounts, the bumper can be pulled forward and it will hang on the bottom skirt, recking forward. (Such a focus does not work on all cars). On some cars, the headlights are removed separately.
2. Absolutely all headlights have 2 main parts: it is transparent glass (plastic) and body (base). All reflectors, fasteners and headlight corrector are installed in the housing. The main thing: the glass is supplied to the P-shaped horizontal profile, throughout the perimeter. Basically, he holds the sealant and latch, but it happens that there is still a couple of small screws. After dismantling, inspect the headlight carefully, for their presence.
3. All headlights are sealed in two ways: on thermo-erotic cells and rubber glue. To find out how sealing is performed very simply, it is enough to take a thin flat screwdriver and insert it into the outer joint of the transparent plastic and the headlamp housing, beate a little. In the event that the headlight is sealed with thermo-erotic cell, you will see how this sealant is stretched (from the dark it becomes light), a stacking screwdriver (easily rubbed with a solvent). If the screwdriver is not dirty, and the edge of the feed is moving with a large force from transparent plastic - then this is rubber glue.
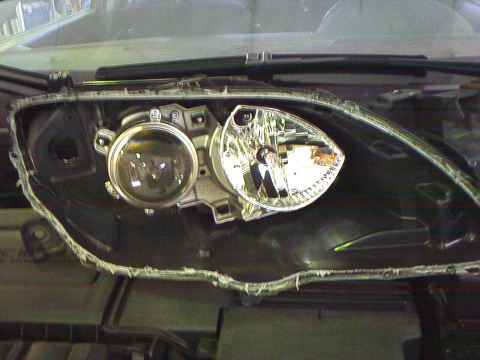
4. Disassembly headlights. Disassembling optics on thermoethotics.
Carefully inspect the optics from the rear. Watch add. The fasteners of the glass to the housing - screws. If they are, unscrew (usually 4, 5 or 6, depending on the manufacturer).
5. You will need a construction hairdryer. Prepare both headlights for disassembly (see clause 4). Turn on the hairdryer to the maximum temprerate. Put the optics on the back so that the glass is from above. Start heating, around the perimeter of the location of the glass to the case. Gray so 6-8 minutes. In a circle, slowly moving. Transparent plastic is very durable and heat-resistant, it is difficult to damage the temperature (if only it is not specifically starting to warm in one place). When the right time passed, remove the construction hairdryer toward the side (remember that its nozzle is metal and very hot, so look carefully where and how you clean it). Carefully fold the latches. Start a large minus screwdriver to move the glass from the housing, inserting a screwdriver into the slot between the plastic glass and the headlight housing. If the sealant is warm well, then the glass is without much effort and comes out of their P-shaped profile. In this moment, warm sealant is stretched, forming fibers. Carefully cut them with a knife. If the sealant got to the reflector, do not try it immediately. Let it cool, the cold sealant will not swing and easily shakes.
==================================================================================================================
4.1. Disassembling headlamps on rubber glue.
With this type of headlights a separate story.
For disassembly of such optics, patience must be patient again.
We look at the optics from the rear, if there are screws that fasten the glass to the body - unscrew.
4.1.2 We take a thin flat screwdriver, a length of 10-15 cm. 4- 5 mm wide.
5.1. We warm the optics, Solasno item 5.
Gray first 6-8 minutes in a circle. It softens rubber glue and plastic. Next, we warm the plots long 7-11 cm. On each site for 30-50 seconds of intensive warming (do not overheate the plastic base, it will become very soft, you will have to wait for its cooling). Immediately after the sewing site, we insert a screwdriver into the slot between the base and transparent glass, begin to bend the edge, passing down the glue (the heated glue is usually easily separated from one of the surfaces when we reject the edge). We make such an operation as much as you need to open the entire perimeter. After this, the headlight is not yet easy, as it keeps glue on the inside of the P-shaped profile. In order to finally demotize the glass, you need to warm up once again in a circle of optics, 6-8 minutes. Pslet, locally, 10 - 12 cm to warm the sections of 30-40 seconds. And already insert a screwdriver through the rented upper edge of the base (housing) of the headlights, under the plastic glass, between the glass and the lower edge of the headlight housing. The inserted screwdriver is as long as the glue cools down (usually 3-7 cm at a time). At the corners, the German is especially careful.
In the process of parsing the optics, minor cosmetic defects of the headlamp housing edges are inevitable: when we warmly with an external part of the profile, we reject it all over the perimeter. The edge is deformed, becomes wave. To correct this defect, after dismantling the glass, on both headlights:
a) cut off the sharp knife of the residues of the rubber sealant of the height of the headlight and from the glass,
b) Gray with a hairdryer of the headlight housing edges and restore the geometric shape (P-shaped profile).
===================================================================================================================
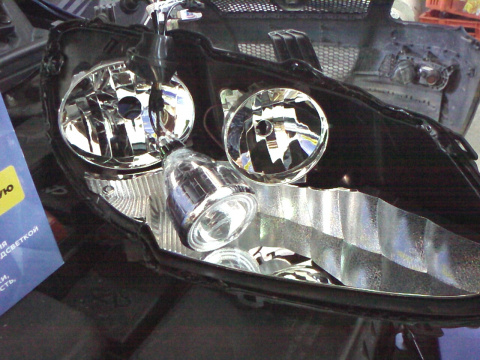
6. After disassembling 2 headlights.
After 2 headlights were disassembled, it is necessary to remove the decorative chrome panels covering all the insides of the headlights, with transparent glasses. To do this, inspect the item. Usually for fasteners of chrome decorative parts are used small latch and always 2.4, 5 screws
(If we put the lenses, then Noun 6 does not need to be performed).
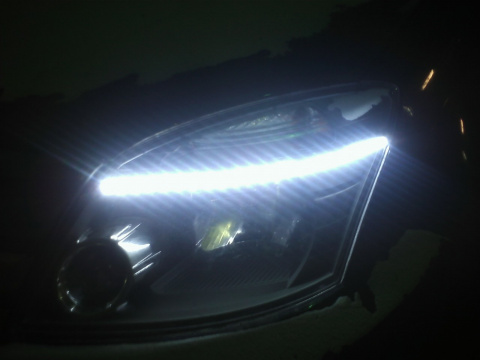
tuning Optics: Installing bixenon lenses, angel eye, LED cilia. Fundamental rules"
8. The assembly is made only after checking the installed equipment.
9. Assembling headlights on thermoegertic. Gray with a hairdryer of transparent plastic edge 2-3 minutes, in a circle. Next, warm 2-3 minutes of the edge of the p-shaped profile of the headlight housing. We insert the glass into the profile. Click around the perimeter. Gray 6-8 minutes already connected parts, in the connection site, in a circle. Click again the glass. If there are screws fastening screws to the headlight housing - tighten the screws. If one latches are standing - snatch. Put the headlight and let her cool.
9.1 Assembling headlamp on rubber glue.
Since glue we removed, we need a sealant to glue the headlights. Suitable car black sealant. Consumption: 1 Tube on 1 Faro.
10. Before gluing in trying the details. Tightly press the glass to the headlamp housing and look at how glass sits. If the glass is badly included in the profile, clean the rubber glue from the profile, try again. If deeply enters the profile, then pressing the glass, screw 2 screws from above. We turn the headlight, press the glass tightly to the headlight housing, screw two more screws. Screws screw in the corners of the headlight. Screws long no more than 5mm. Screws are needed for the initial fixation of the glass in relation to the headlight housing.
11. Unscrew the screws and remove the glass.
12. We apply sealant in the P-shaped profile. Fill before the top.
13. After applying the sealant, align the layer. We clean up too much.
ATTENTION: The installation of glass must be made from the first time.
14. We put the glass. Press it tightly to the headlight housing. Screw to the finished holes of the screws.
15. Wash the extra sealant from the headlight housing.
If you have any questions - write.
16. We put in an atombit.