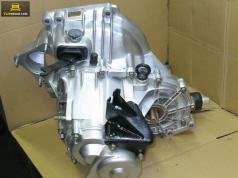
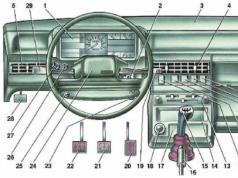
Our instruction will tell you in detail, about eliminating the problem of leakage of oil from the checkpoint due to the failure of the grooves of the gear shift, the primary shaft, or the inner screws. Replacing the glands of the VAZ 2109 boxes can be carried out in two ways.
The first method (when replacing the primary shaft seal) requires dismantling the box. The second way (replacement of the gland on the rod or the shrus gland) is made without removing the checkpoint on the car itself.
The method without removing the box is faster and simple, so it is in the first place.
Diagnostics of the problem
So:
- Symptoms indicating the need to replace the gearbox seal, this is primarily oil traces left on the asphalt after the car parking.
- Before changing the gland, you should first make sure that it is in it.
- Since the cause of the leakage of oil often becomes poorly fastened oil filter.
- The late detection of a problem associated with oil leakage threatens serious consequences.
- If you have not been detected in a timely leakage of oil from the box, it will follow completely, and then instead of the gland, the price of which is 50-100 rubles, you will have to repair the checkpoint (see), and the price will increase significantly.
- To prevent this, it is necessary to periodically check the oil level in the engine and in the checkpoint.
- The insufficient level of oil in the checkpoint can manifest itself with a characteristic crunch arising when switching transmissions.
Replacing the gland of the stock of the gearbox VAZ 2109
You will need:
- Shily like a knitting hook or something similar.
- Keys for 10, and 13.
- Shilo usual.
- Plastic plug from mineral bottle.
The replacement is made on the observation pit or the lift. If there is nothing, you can use a cheap alternative in the form of two placed plastics.
We take two boards early, and enter such an improvised exaltation. The work will naturally have to be done lying.
ATTENTION: After check-in to a hole or repairs for repair, fix the car, for the sake of your own security using, handbrake and additional anti-tottal wedges (shoes).
Replacing the gland in the transmission box VAZ 2109 is performed in the following sequence:
- We get to the rod, switching transmission, it is covered on top of a rubber boot.
- If he misses the oil, then find it is very simple on the oil stain (see the photo below).

- We flex a wide part of this anther to get to the Kardanchik, who is located under it, fleeing to the rod.
- To gain access to the gland, you must disconnect the cardanchik from the switching transmission lever and from the rod.
- We use the key to 13.
- We unscrew the nut completely, it will help weaken the connection of the lever with the cardanchik.
- Give the lever from the cardanchik, in this way, thus the 1st or 3rd gear.
- We use the key to 10 to disconnect the cardane from the rod, we assign the lever to the side.
- We dismantle the cardanchik.

- Next, we remove the rubber boot, now we see the reason for the repair - this is the grooves of the gearbox.
- It is located in a special recess - this is the place where the rod enters the box.
- It is impossible to extract this gland without applying a special tool, so we take a special sequel and take care.
- You can use the self-ease as an option, the principle is very simple - you need to screw the self-sustain in the gland and "uncover" it like a corkscrew.
- When you removed the old you can start replacing.
- Previously, it is necessary to clean, as follows the landing place from sand, oil, and other contaminants.
- Now you can press a new gland in the landing place.
The replacement of the gathering box of VAZ 2109 is easier using a plug from a plastic bottle:
- It is done so, cut out the inside of the plug and install a new gland through it.
- You can do without traffic jams, this is a master's business.
- We produce a lever assembly in the reverse disassembly sequence.
Note:
- When replaced the gland or produced any works associated with the fastening of the lever of the gearbox and the kardanchik, the scene, which is resolved in the car, is strongly shifted, which makes it impossible, in some cases, switching speeds.
- Here the whole problem is hidden in the screw to 13, which connects the cardan and lever itself, switching speeds.
- Not everyone is known, it (screw at 13) is not only fixing, but also adjusting.
- Therefore, upon completion of work, be sure to check, in what position you have a lever and adjust, if necessary, its position.
- Only now you can safely assemble the tool and wash your hands.
- After the assembly, you must check the oil level if the low level must be addressed, and then we can check the operation.
- Drive a couple of circles and make sure that the oil does not happen anywhere else.
- That's all, I hope our instruction was useful for you. As you yourself were convinced of the replacement of this gland, there is nothing complicated, and there is no point in overpaying for services.
Replacing the silvan of shrusov
So:
- To replace the inner screws (hinges of equal angular velocities), we definitely drain the oil from the checkpoint.
Note: Replacing the shelves of the shruses is made, without removing the gearbox with a car for VAZ 2109.
- For replacement, you must disconnect the front wheels from the box.
- To do this: Remove the protective cap, and open the nave nut.
- Weakening the tightening of the bolts, fastening the wheels and the tightening of the nave nuts.
- The nut of the hub is clamped with great effort, so we recommend using as a lever, cut tube.
A warning:
When unscrewed nuts, the machine must stand on Earth! We relax and tighten the bolts that fastening the wheels only on the car standing on the ground. The tightening moment for bolts is 65-95 nm (which corresponds to 6.5-9.5 kgf).
We continue:
- Turn the car VAZ 2109, the parking brake, we set the stubborn bars (shoes) under both rear wheels of the car and raise the front part by setting reliable supports.
- Remove the front wheel from the car.
- Then we unscrew to the end and remove the nave nut.
- With a screwdriver, we remove the stubborn washer.
- We take out the pin fixing the nut, which is a fastening ball hinge thrust to the lever.

- We unscrew the nut with a fastening ball hinge steering thrust.
- Special puller Press the finger of the ball hinge of this steering thrust from the Rack Lever.
- We unscrew two bolts and disconnect the hinge lever of our front suspension from the swivel fist.

- Pull the swivel fist to the side along with the rack and take out the shank of the outer hinge from the hub.

- Using the mount, squeeze the shank of an internal shruss from the checkpoint.

Note: If you take both drives, then after removing one, insert in its place in the PPC the technological plug (or the old Schlus) and only then remove the second one. Otherwise the differential gears will definitely be shown, and you cannot insert the Sls during the assembly
- Remove the front wheel shaft.
- Remove the hinge gland with a screwdriver from the gearbox housing.
![]()
- Then we will prescribe a new one with the mandrel of a suitable diameter until the stop, the working edge looks inside the checkpoint.

On this replacement of the gearboxes of the VAZ 2109 gearbox (shruselists) completed, make the installation of shruses in the order, reverse removal. As you can see, do this procedure with your own hands is not so difficult.
Causes of clutch compression
The reason for the gripping of the clutch is to flow the rear seal of the crankshaft, or the peel the primary shaft of the gearbox. Transmission and engine oil have a different smell.
Therefore, an experienced motorist, maybe in the smell of oil to recognize which of the oil salts has failed and requires replacement. In this case, you will have to remove the CAT from the car.
Change the primary shaft seal
So:
- To remove the box, we make removal of shruses, as already described above.
- Instead of one of the shruses, insert the old or special plug so as not to crumble differential.
- We turn over the mounting bolts (three of them) and remove the clutch case shield.
- Weakening the tightening of the bolts and nuts that are fixing the clutch housing to the block.
- We put on the flanges of the wings located in the area of \u200b\u200bthe pillars of the rockets suitable bars from the tree and install a transverse bar on them to squeeze the engine.
Warning: A timber relies exclusively on the flanges of the wings! Otherwise you risk interfering the body.
- We train the engine per rhy with a long bolt with a hook to the bruster.
- For this, a solid rope or wire is also suitable.

- We unscrew the two nuts that are fixing the back of the engine to the body.
- We turn off the nut and get the bolt of the left support.
- We unscrew three nuts that are fixing the left engine support to the checkpoint, and remove the support.
![]()
- Finally unscrew the bolts (three pieces) and the nut (on the reverse side of the checkpoint).
- Removing the gearbox from the VAZ 2109 machine, first we take it in the horizontal plane from the engine to pull the primary shaft from the clutch disks.
- Be careful, do not damage the petals of the clutch spring.
- Remove the release bearing clutch.
- We unscrew three bolts fixing the guide sleeve (under the bolts there are spring washers).
- Remove the guide sleeve.

- Using a suitable wire hook, get the gland from the PPC.
- We will prescribe a new one with the help of a suitable diameter.
- The working edge is directed inside the checkpoint.
Tip: Before installing a transmission on a car VAZ 2109, it is recommended to lubricate the surface of the guide sleeve and the slot of the primary shaft outside the surface of the guide sleeve and the slot of the primary shaft. Cement the slave clutch disc with a special mandrel (the old primary shaft is suitable with good slots)
- Install the transmission on the car.
- Before connecting the front wheels, we replace the locking rings at the ends of the internal scruses.
- Otherwise, the likelihood of an increase in drives from the gearbox appears when the car is moving.
- Finally tighten the nut fastening the stretch to the lever on the loaded suspension, while the car is already on the ground.
- Replace oil in the box (see).
This is how the replacement of the glands is made, there is nothing superpower in it, you can also watch the video.


