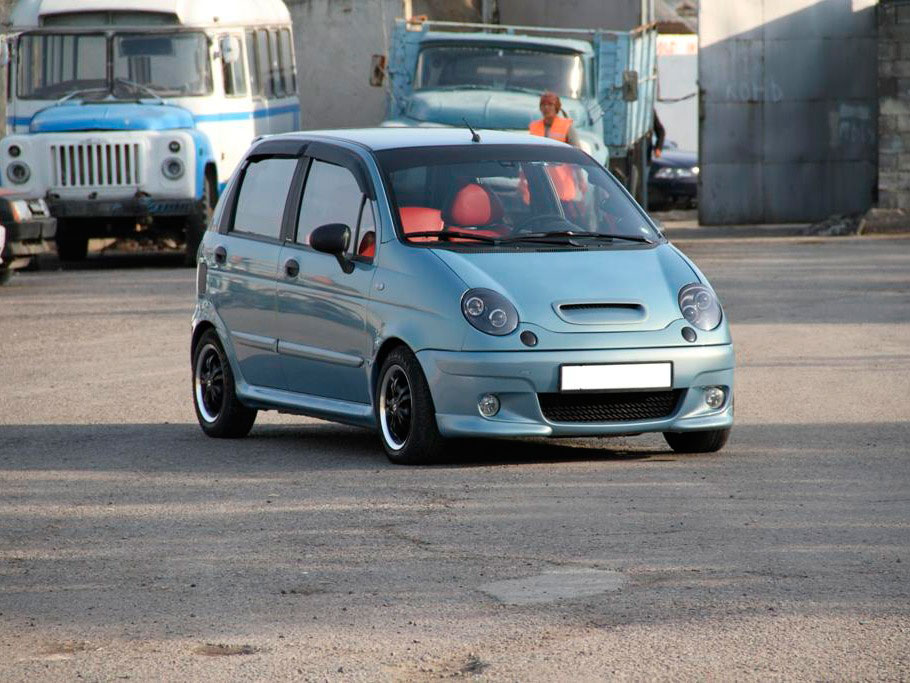
Many Daewoo Matiz owners preferred this particular car due to its compact size and quite a pretty appearance. But otherwise this machine has mediocre indicators. Therefore, many are solved on Tuning Daewoo Matiz, especially since this car allows you to make a lot of interesting things with you. It is noteworthy that it is not very difficult to make matiz tuning, since for this you can use spare parts and details from other cars.
Modeling the technical component
Tuning and refinement to Daewoo Matiz can be started with suspension. To make it more adapted to our road conditions, just replace shock absorbers. And for this you will fit the elements from Lada Kalina.
Replacing shock absorbers - the operation is not very simple, since it will have to practically completely disassemble the suspension. Special difficulty lies in the fact that the springs of shock absorbers are in the underlying state, therefore, without the presence of special screeds, the springs can not do. But if the skills of repairing Matiz do it with their own hands, it can be carried out completely to the replacement of suspension elements in the garage conditions. In addition, making the replacement of shock absorbers, it is necessary to immediately change all consumables.
But after such alterations, the tunned Matiz will more confidently keep the road and "chew" bumps and pit.

Matiz engine tuning is also made. Here, concrete processing do not get due to the design features. Still, on a 3-cylinder unit to find any tuning and modified spare parts is almost impossible.
But you can affect the system. For example, it is possible to change some injector sensors, as well as throttle. Here are the elements from Fiesta or Solaris.

And after conducting chip tuning Matiz to get better performance and dynamics at the exit. Here we note that the installation of a 1.0 liter of the volume will be chipped, but it will not work with a 0,8-liter unit to do this operation with a 0,8-liter unit.
Daewoo Matiz is a compact and low-budget car, ideal for a dense urban mode. The car is characterized by special maneuverability and very easy to manage.  Good equipment Salon Daewoo Matiz provides convenience and comfort both to the driver and passengers. The cost of this model today on the territory of Uzbekistan begins from 8000 USD, for almost a new car in a modest configuration and from 11,000 USD For the modification of "Best".

This car has a large selection of accessories that give the hatchback special style. Alternative optics, spoilers, visor, air intakes, thresholds are far from the entire list of accessories available and suitable for high-quality tuning of the car Daewoo Matiz.
Engine tuning
 The car Daewoo Matiz is a small car with good technical indicators. Depending on the configuration on the DEU Matiz, a 3 or 4-cylinder engine with a volume of 0.8 - 1 liter is installed. Daewoo Matiz fuel consumption ranges from 5.0 to 5.5 liters. On the track (speed of 90 km / h), and in urban mode 7.4 - 8.0 liters. per 100 km.
 If desired, you can produce a car tuning:
- chip tuning;
- installation of tuning camshafts and drive gears;
- an increase in the working volume of cylinders.
The last two points are possible when installing crankshaft, rods, pistons from Chevrolet Aveo, the engine volume is 1.2 liters. Cylinders can be crowded to 1.2 liters, while the power will increase to 70 liters. from.
Optics, discs, body kit
Optics of any car is his business card. The installation of the front tuning optics is equipped both in the style of Angel Eyes (Angel Eyes) and in the style of Day Line (LED Cilia Like Audi R8). Tuning rear lamps matiz is most often completed using LED technology. It should be noted that the entire tuning optics presented on the market is easily installed in regular connectors.

The most effective way to change your car is the installation of the aerodynamic body kit, which includes the installation of the rear and front bumper, overlays on the thresholds, spoilers, the grid for tuning the radiator grid, the hood deflectors and much more. It should be noted that these items are made from a number of materials: fiberglass, polyurethane, plastic. A separate question is the choice of discs on the car.

When choosing discs on Daewoo Matiz, it is necessary to take into account the necessary disk diameter and its type (cast or steel). The main parameter when choosing disks on Daewoo Matiz is the number of mounting holes and, of course, the diameter of the circumference of their location. The wheels with a diameter R13, R14 are perfectly suitable, it depends on the year of production of the car and its configuration.

Suspension
Installing the sports suspension on Daewoo Matiz from manufacturers of leading firms of Europe (TA Technix, FK-Automotive, MTS Technik) will provide not only excellent specifications, but also reliability and durability. Installation of branded suspension provides better car stability and reduces body rolls.
Tuning Daewoo Matiz will turn a quack car in fast compact car
You can also install a screw suspension on this car, which will allow you to change its characteristics to specific situations. In addition, some sets of this suspension are adjusted, both the road lumen and the degree of stiffness of the shock absorber. Springs with an understatement for 25 or 30 mm are easily installed on "native" Daewoo Matiz shock absorbers. It should be noted that the springs not only emphasize the sporty nature of the car, but also provides comfortable driving conditions for the driver and passengers.
As a result, thanks to such a popular revision of the car, like a car tuning, even from modest small car can create a unique car. Which will emphasize the individuality of the owner and stand out from the crowd.


Improve in Matiz
Tuning Daewoo Matiz. Photo report
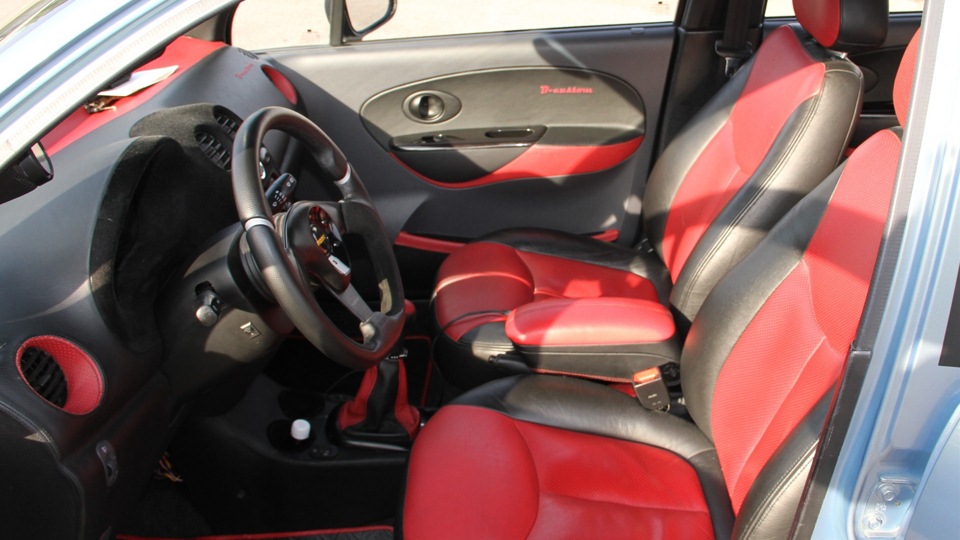
1. Installing covers for seats from leather.
They turned to the "B & M" office mentioned in the forum at Dubnenskaya http://www.avtobm.ru/. We studied the range of products offered - I did not like it. We agreed that the covers of the materials purchased by us would be saved (refused only from the guarantee). They found out where they can buy high-quality leather. http://www.confy.ru/ bought the required amount (1.5 m) and taken to the studio. Independent installation of covers does not represent much difficulty. Good assistant, a couple of pee, a bit of patience and 1 hour of free time.
Remove seats and plastic sidewalls (see photo 1.1).

Photo 1.1.
Wear a cover on a survey. I pull on the lower edges down and in a styrene back, while smoothing the cover at the same time, while I am correcting the cover so that he sat clearly on the relief of the seating (here it is necessary for the assistant). Wake up the laces on the side. I turn to the top of your legs. I pull for the rope (see the Red Arrows in the photo 1.2) and at the same time refuel the extension cloth of seats for the lace (see the blue arrows in the photo). I smoothed the covers (so as for the folds) and tie the cord. Rubber bands cling as shown in the photo.

Photo 1.2.
The back is delivered like this: we dress the case, carefully, smoothing out your hands, wear as close as possible (do not overdo it and do not break !!). Tie ropes from below. When tying, do not pull a lot, and then there will be ugly "harshes". Do not try to pull the back so that the openings coincide with the head restraints - it is almost impossible. The rear seat is tensioned at all elementary. Again, when pulling the lace, be careful not to break the case.
Another advice is all work at a temperature of at least 20 degrees. The skin is more elastic and is better reached.

Photo 1.3.
Finance:
1.
Production 3000r.
2.
Leather. 165r.
3.
Beer 100-200r.
TOTAL:3365r.
2. Tights in the inside of velvet doors. (oval part of the MAT MATIZ door
Material: Velvet 1m / GG (for 4 doors), glue moment Universal 3pcs, manicure scissors.
Remove the sheathing of doors and unscrew the panel from it with the buttons of the windows. We put the cover horizontally, cut off a piece of material about 50x80cm, we applied the glue with a thin layer on the inner part of the oval contour (the amount of glue is determined by the experimental way - it should not be abundant otherwise, when gluing it, he fits through the fabric outside). Gently in four hands we apply velvet on the adhesive surface at an angle (starting better with a flat surface, and gradually lowering the fabric smoothing it into a convex part). Formed folds need to be carefully removed, stretching fabric to the sides. Next, without losing time you need to cut off the extra parts of the tissue clearly along the hollow in the trim (it is where the edges of the velvet have to be raised), for this we use manicure scissors, and not in a hurry, 1 cm start cutting the fabric (cutting off the fabric you need to quench the cloth about 3- 5mm.). I cut off everything too much, take a tube of glue and put it on the inside of the luggage of the trim (try not to pour it entirely, otherwise, when strokes the material there, we begin to break the fabric (the procedure is quite vigorous, but the second door will already be " Nabe "). And finally cut the holes under the door handle and the panel with the buttons. We screw all in place. Ready. (for the first time he heed for this business, spent only 2.5 hours on the finish of four doors).

Photo 2.1.

Photo 2.2.

Photo 2.3.
Finance:
1.
Velvet - 400r.
2.
Glue - 120r.
TOTAL:520p.
3. Tights in the internal racks velvet and leather.
Material: velvet / leather. 0.6 m / GG, glue moment Universal, scissors.
We remove the plastic racks (6pcs), for this we will unscrew the seat belts, and the racks themselves hold onto the pistons - we pull. If you have a LED from the alarm on your front driver's rack and it is simply not pulled out, you will have to bite the wires from the diode and twist to twist or solder them back. We put the stoics horizontally, we apply glue, we apply velvet, cut the edge with an indentation of 1-2 cm and we are converted to the opposite direction. By time it takes about 1 hour. Obrachka is carried out by the same prince. Only so that the glue does not burn the rubber base of the skin. We will have to pre-cover the opposite side of the PVA glue layer (it will serve as a primer), give it to dry and start working.

Photo 3.1
Photo 3.2.
Photo 3.3.
Photo 3.4.
Photo 3.5.
Finance:
1.
Velvet 240r. / Leather. 66r.
2.
Glue "Moment" 80r. (PVA - 60P.)
TOTAL: Max 320p.
4. Roof tightness by plush or velvet
Material: Fabric 2m / GG, liquid tape (glue) (see photo 4.1)

Photo 4.1.
The roof removal takes about 10 minutes: unscrew the seat belts, pull all the racks, unscrew the ceiling handle visors and a cabin lighting ceiling, take all the pistons (you will have to tinker with the central, see photo 4.2, 4.3), pull the door seals. Everything. Gently pull the roof through the back door. To glue the matter, we use an aerosol adhesive (usually sold in large parts of spare parts, such as "Rus"), if the material used is sufficiently weighty - for example, a plush, then you need to add a couple of "torque" tubes or purchase more expensive liquid tape. We apply adhesive on both bondable surfaces, if necessary, add "moment", extruding the tube S-figuratively on the entire surface of the roof, put the tissue, smooth and give it to the hour 4. It will be better if you provide a load, for example: to draw a bunch of pillows. Further, if appreciate aesthetics, you have to paint every piston in the color of the future roof. This can be made with a marker or as the paint spray is laid, but in any case it will have to go on a lacquer, otherwise the paint will fly away, and the marker will sweep away from the fingers. Cut in the fabric all the technical openings. I screw everything in our place and enjoy beauty))

Photo 4.2.
Photo 4.3.
Finance:
1.
Plush material 500r. / Velvet 800r.
2.
Liquid scotch 180r. / 480r.
3.
Marker / paint 90r.
4.
Varnish 90r.
TOTAL: MAX 1460R.
5. Painting of the central console, insertion in the checkpoint and the ceiling lighting.
Material: The solvent degreaser (only not domestic White Spirit !!! It dissolves the paint, and does not degrease the surface. After it, fatty divorces remain) 1pc., Primer for plastic (spray) 1pcs, paint (spray) 2pcs, varnish (spray) 1pcs ., Malyary Scotch 1RU., Plastic screed 10-15Santimeter - 2pcs.

Photo 5.1.
Removing the center console of the instrument panel: 5 screws, neatly, but strongly pull the console on yourself when it will be disconnected from the torpedo you will need to turn off the 2 top buttons from the reverse side. Then unscrew the nozzles of the air ducts.
Removing the insertion of the checkpoint: first we bite the buns, which keeps the gear knob on top of the casing. Next, the index finger cling to the insert in the hole under the handbrake and stretch up when the first latches take the box on the sides and swaying to the sides continue to pull up. After driving the insert, unscrew the four screws holding a frame with a casing from the reverse side.
Removing the lighting ceiling: a slotted screwdriver cling to plastic glass (see photo 5.2), we find and unscrew the two screws behind it, remove the plafof from the roof and disconnect the terminals.

Photo 5.2
Preparation for painting: From the outside, we glue the glass of the ceiling lighting of the salon lighting with painting scotch, we bring the edge of the tape for the opposite direction and insert the glass into place (it is necessary that when painting does not paint the inner parts of the ceiling, where the light and terminals are located). Prepare the room for painting. It should be a clean room, without drafts and preferably with a minimum amount of dust and insects. Degrease the surface of the parts with a solvent, thoroughly rubbing it into the surface, repeat the process several times, it is important - otherwise neither the primer nor the paint will lie and do not appear contracted bubbles. Position the prepared parts so that, not touching them with their hands to them, it was possible to go from all sides. It is better to work in the room one to avoid moving dust in the air.
Painting:
1. Index the soil for plastic, holding a balloon at a distance of about 80-90cm. (If you bring the ball closer, then the soil falls on the surface too abundantly and dries longer). It is better to apply the soil with two three thin layers than try to be made abundantly with one layer. We are waiting for complete drying (15-30min.)

Photo 5.3.
2. The paint is applied with thin layers at a distance of 30-40 cm., With a break of 20-30 minutes. The number of layers varies from 6 to 10. Between the staining of 6-10 layers you need to take breaks about 1 hour, because in the set of layers they dry much longer.

Photo 5.4.
3. Varnish is applied only after full drying of paint! (If there is a possibility, then you begin to apply the varnish the next day, it guarantees the quality and durability of the future part). Also applied thin layers, holding a balloon in 30-40cm. With a break in 10-20 minutes. In case of abundant application of varnish, it can simply wash off even fully hardened paint, so the hurry is excluded here.

Photo 5.5.

Photo 5.6.
Photo 5.7.
Finance:
1.
Solvent 60r.
2.
Primer for plastic 240r.
3.
Paint 190r.
4.
Acrylic varnish 100r.
5.
Malyary Scotch 60r.
TOTAL: 650r.
6. Tights of sunscreen visors and gearbox
Here, of course, the matter is not a man - you have to use the sewing machine, although you can try.
Materials: velvet / leather. 0,5m / GG, plastic ties (pair of pieces)
Remove sunscreen visors (4 screws). For removing the gear knob, we bite the screed at the knob (see photo 6.1), pull out the insertion in the checkpoint is similar as when painting, we unscrew four screws from the reverse side and disconnect the frame with the casing. Next, a knife or screwdriver flexing the clips that attach the casing to the frame. For the manufacture of new casing and "covers" on sunscreen visors you will need patterns, they will have to do themselves. Get the pattern of the PPC handle is very simple - you need to spread the old case and attach pieces on the material from which you will sew the casing. But over the patterns of the visors will have to be patted.
The finished cover of the PPC dresses on the frame (where they were clips) and sewn around the perimeter by conventional threads. Holes there enough. Do not forget about the plastic screed at the top of the cover.

Photo 6.1.
Case for visors is similar to the usual soft case for glasses. Only it sews in tension and then the edge is sewn with threads (see photo).

Photo 6.2.
Photo 6.3.
Photo 6.4.
7. Installing the Prosport tachometer in the air nozzle hole
Material: Plastic box of DVD, screwdriver, cutter, insulation, greasy tape, black marker.
Tachometer Prosport 6.5 cm. tonir. It was bought in the company store http://www.pro-sport.ru on the site itself is not. You need to call and ask.

Photo 7.1
Removing the center console of the instrument panel: 5 screws, carefully, but strongly pull the console on yourself when it will be disconnected from the torpedo it will be necessary to turn off the upper buttons from the reverse side. Then we unscrew the nozzles of the air ducts and take out the guide air with a grid of the nozzle cylinder.
1. To secure the device in the left duct hole, you will need to make a plastic insert between the tachometer and the nozzle cylinder (this is a kind of washer that serves as an adapter, to the inner part of which the tachometer itself is inserted, and it is inserted into the outer edge of the duct cylinder). I made it from a black disk of a black DVD. To do this, we apply the facial part of the nozzle cylinder to the plastic and supply the nail over the external contour. It turned out a circle of an external nozzle radius. Next, we retreat 1-1.5 mm into the inner part and cut the circle cutter, then customize the item so that it is clearly sitting in the groove on the outer part of the duct. After that, you just need to cut the hole in the plastic for the tachometer itself, shifting it from the center. We insert the tachometer into the manufactured adapter and wind the tape so that it does not fall back, insert into the nozzle and screw the screws. Then, it is important that the device, being in the nozzle of the air duct, is not damaged from hot or cold air, so in the free space of the tachometer, it is necessary to put a porous material (for example, a sponge for washing dishes) and then put the back of a painted scotch in several layers.

Photo 7.2.
Photo 7.3. Nozzle from the front panel. Under it cut the puck of plastic

Photo 7.4. That's what happened

Photo 7.5. The washer should clearly in his place
Photo 7.6. We dress the washer on the tachometer
Photo 7.7. The washer should dress tight.
Photo 7.8. We wake a few turns of the tape so that the tachometer does not jump out of the washer
Photo 7.9. That's what happened
Photo 7.10. We pave a porous material for thermal insulation
Photo 7.11. We glue by paint and sneeze too much
Photo 7.12. We paint the marker.
Photo 7.13. Put in place
Photo 7.14. Turn off the bobbin connector
Photo 7.15. Here it will be necessary to connect
Photo 7.16. Tighten the rubber cap. Under it is a green wire. Gently cut it with it and adhere to (and better fit) the wire, which is stacked in the corrugation, going to the salon.
2. Connecting a tachometer. As a rule, the color policy of the wires is the same everywhere. In my case, this is:
- Green - on Bobin
- Red - on "+"
- black - for mass
Now in order. The green wire is conducted from the plus terminal on the Babine into the cabin through the hole under the steering column. Locking the wire in the open space is desirable to shove it into the factory corrugation (in order not to attract the attention of masters on the services), and in the auto cabin to the installation site - it is better to cling to it with ties to any accessible parts from the driver's feet. Red you need to connect to a plus wire on a terminal block of alarm buttons (brown with a white stripe), but black on the same block to black. Thus, the device will be included with the overall lights.
Daewoo Matiz - first-class tuning with her own hands
Gently open the shell of the right wires, slightly retreating from the block (a couple of centimeters) and primed it (and better solder), after which it is carefully insulated.

Photo 7.17. Connect wires
Photo 7.18. Fresh construction in place.
We establish the center console of the torpedoes in place - ready. In time about 3 hours.
Repair and tachometer adjustment.
Since the tachometer is operated with high vibration and high temperatures, it may come the day when it starts to "bug" - incorrectly show turns. You can attribute the device to the service or (if the warranty is over) to fix it yourself.
Materials and tools: Medium flat screwdriver, hour screwdriver, round-roll, "super glue."
We take a tachometer from the panel and turn off the connector on the back side.
Gently with a screwdriver rational (fill around the perimeter) and remove the lid. Try to do not take on a plate with a drawn scale. Warm - Muffy polished

Photo 7.19.
Photo 7.20
We unscrew the rear two screws and take out the inner block. ATTENTION!!! Before removing the block, make sure that there is no static electricity! For this, it is enough to hold the iron and massive (for example, unpainted parts of the car, a tap tube).

Photo 7.21
Photo 7.22.
On the rear wall of the block there is a small variable resistor (see photo 7.23). It needs to be adjusted.

Photo 7.23
Methodology: Turn the slider to the clockwrench several times until the stop is stopped several times (in order to erase the oxide layer, which could be formed during operation). We connect this block to your wire to place (without collecting back). I exhibit the arrow with your hands in "0". Next, we start the car (it must be fine) and turn on the dimensions. One hand is holding a tachometer and look at the arrow, and the other rotate the resistor until the arrogant arrives at 850-900 rpm (idle speed). Wasting machine, turn off the block.
Now the resistor must be fixed in this position so that it does not move from vibration. To do this, we take a thin sharp object (needle, paper clips), macaus in glue and dripped a drop on the resistor.

Photo 7.24.
We give adhesion to dry, once again check the performance, collect and mount it back.

Photo 7.25. Rolling the cover
8. Finishing internal elements by rhinestones.
It's completely simple here. You will need only tweezers and "super glue." Before you begin the process of sticking rhinestones, you must lay out the desired option to the details, align and fit the composition and, after later, lifting each stratina to apply glue on it and put in place.

Photo 8.1.
Photo 8.2.
Photo 8.3.
Photo 8.4.
Photo 8.5.
LECLERC AKA Vladislav
Staric Aka Sergey
[Email Protected] Aka Svetlana
Piglet Aka Kira
The result of the work can be viewed here.
Technologies are used ucoz.
Tuning Matiz do it yourself or how to modify Matiz, how to improve Daewoo Matiz? This article is devoted to refinement and tuning Matiz and Chevrolet Spark
Matiz and Spark Machine A-Class and their disadvantages are a continuation of their advantages such as small size, maneuverability and consumption. Consider in more detail what can be done from a technical point of view so that riding the car was pleasant and comfortable. Some links lead to the technical section of the Matiz Club, which requires registration.
- Engine
- Oil filter. I recommend to use the MANN 67/2 filter. On the original filter, facilities of oil in the frost are possible
- Carter ventilation system. At negative temperatures, the crankcase ventilation system is frost, which leads to the squeezing of the front kettle of the crankshaft or knock out the oil probe. In the case of leaks through the gland, we are doomed to repair with the replacement of the timing belt and the remaining drive belts. Helps the insulation of the boost space and / or blocking a large ventilation branch with a 10 mm bearing in diameter. The photo will be later
- Oil starvation.
This fear is most susceptible to MATZ with a motor 1.0. It should be done on time and use high-quality oils, the topic on the forum. Remember that the operation of the machine in urban environments refers to complex operating conditions and according to the prescriptions of the plant, the nerservice interval must be reduced. In practice, I change the oil on my car ~ 7 thousand kilometers
- Improved matiz dynamics, how to increase power?
- Chip tuning Matiz. One of the most affordable ways. You can read more and sign up here.
- Tuning choke. Also a budget version of refinement that gives an excellent result.
Cheeky Statencer: Premium Tuning for Matiz
In more detail you can find here
- Tuning camshaft. A little less than the budget option compared to the first two options. Theme on the forum
- Matiz 1.2 l, not myth, but reality! Alteration of Matiz 1.0 Motor 1.2. This option is quite costly, but the result is excellent! Detailed
Under the hood, the baby is not a herd of horses, so the owners often handle how to make the machine go better. It should be noted that tuning can be subject to good and served motors. Consider the main directions of tuning Matiz:
- Suspension. Tuning Matiz suspension
- Springs Lesjofors. Soft and comfortable springs that give an excellent result with KYB racks
- Racks KYB Excel-G. Gas oil racks significantly changing the behavior of Matiz pendant on the road. In combination with lesjofors springs, the best result is achieved.
- Rubber 165/65 / R13. This rubber is slightly broader (155), slightly above the profile, but nevertheless, with these sizes, we get rid of the disease damage to the disks when entering a hole, you can more accurately, but now it is much more difficult
- raising Daewoo Matiz. Matiz has good geometric patency. If necessary, the car can be raised. It is logical to reduce the cost of work raising the car with the work on the modernization of the suspension.
The regular suspension of even a new Matiz from the salon is far from the ideal. That is, quite far from the ideal. Frequent suspension breakdown, digging machine on the road, damage to wheel drives - the flaws with which the owner faces.
You can order the Matiz Pendant in St. Petersburg by calling 8921 750 56in 82
- Transmission
- A frequent problem with a manual transmission MATIZ is a bad turning on gear, especially the second transmission of Daewoo Matiz is especially bad. It will take rid of the illness helps the use of oils for automatic transmission, such as ATF ENEOS DEXRON III. For more information on the forum
- Electrician
- Generator. The Matiz regular generator refuses almost 100% of cases. Solution: Replace to the Mando generator, passing the pulley of the generator from the old generator to the new and forget about the problem almost forever
- Button of heating rear window. The bulk load in the form of heating rear window is turned on directly through the button. The button ishes, melting and stops working. In addition, some salons connect the mirrors to the same long-suffering button, which speeds up its failure. Solution: Put an unloading relay and forget about the problem
- Dashboard
- Displays the motor temperature. The normal indicator of the engine temperature of the Matiz when heated the motor freezes in the same position and does not want to deviate anywhere. Make Arrow Behavior More Informative Helps Installing Temperature Sensor from Daewoo Tico
- Installing the instrument panel panel with a tachometer on the Matiz. More details are discussed here.
matiz Tuning Refinement Matiza, Tuning Matiza, Chip Tuning Matiza, Tuning Chevrolet Spark How to Improve Matiz Pendant, Matiz Tuning Pendants, How to Raise Matiz
The small-sized and inexpensive car "Daewoo Matiz" is distinguished by a friendly exterior, large light elements resembling the "Mercedes" headlights, as well as a narrow strip of the radiator lattice, which is practically not visible. Some owners of this vehicle are trying to give it the original appearance and modernize the "stuffing". Tuning "Matiza" may concern external design, salon, power unit and technical moments. Fortunately, opportunities for the implementation of creative and practical innovations are grabs with interest.
Body Transfiguration
Among the external restyling of the model under consideration, the following manipulations are the most popular:
- painting lattice on the bumper;
- installing other disks;
- installation of mudguards, spoilers and other accessories;
- improving optics and rotary signals.
Tuning "Matiza" allows you to create a unique and one-of-a-kind car with the help of external modernization.
The staffing of the car can be called "good-natured". The model is equipped with expressive light elements that are combined with a bumper grill in the form of a "smile." If you adapt extra LED backlight, you can achieve focusing on this design solution. Power is carried out on dimensional signals, it is disconnected if necessary. Especially beautifully expressive part of the car will look at the dark.
What else can you refine in the exterior?
Another option is to produce tuning "Daewoo Matiz" in the sports direction. To do this, it will be necessary to install new lingers and plastic lining. You can also mount the aerodynamic kit, attaching it with a special glue. Such refinement carries not only aesthetic, but also practical benefits. The car with kit is more protected from scratches and damage arising from the effects of the departing road surface.

If you wish, you can work on the modernization of light elements. Make even more powerful lighting actually by installing xenon lamps. Additionally, decorate the headlights will help expressive special "eyelashes". The illumination of the bottom is ensured by mounting a set of neon lamps or LED tubes that are easily installed at home.
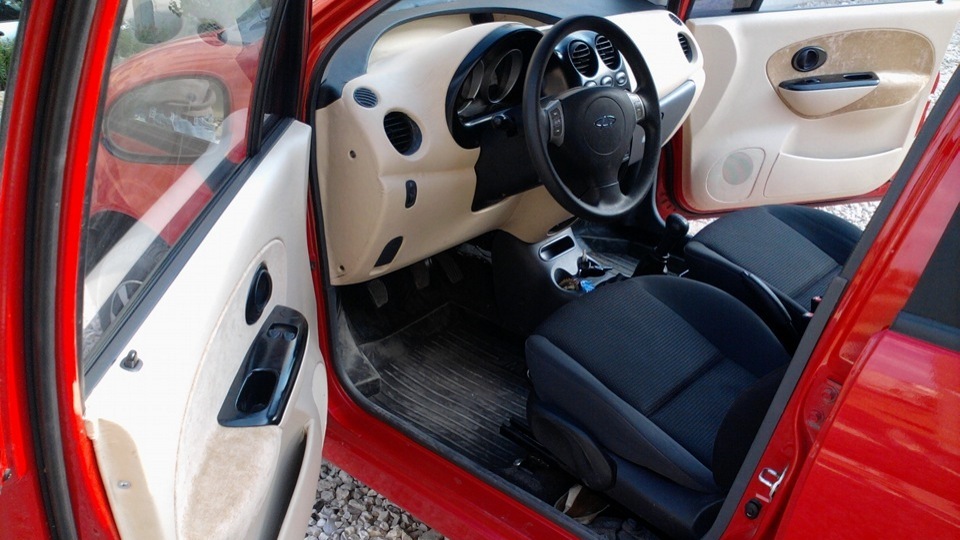
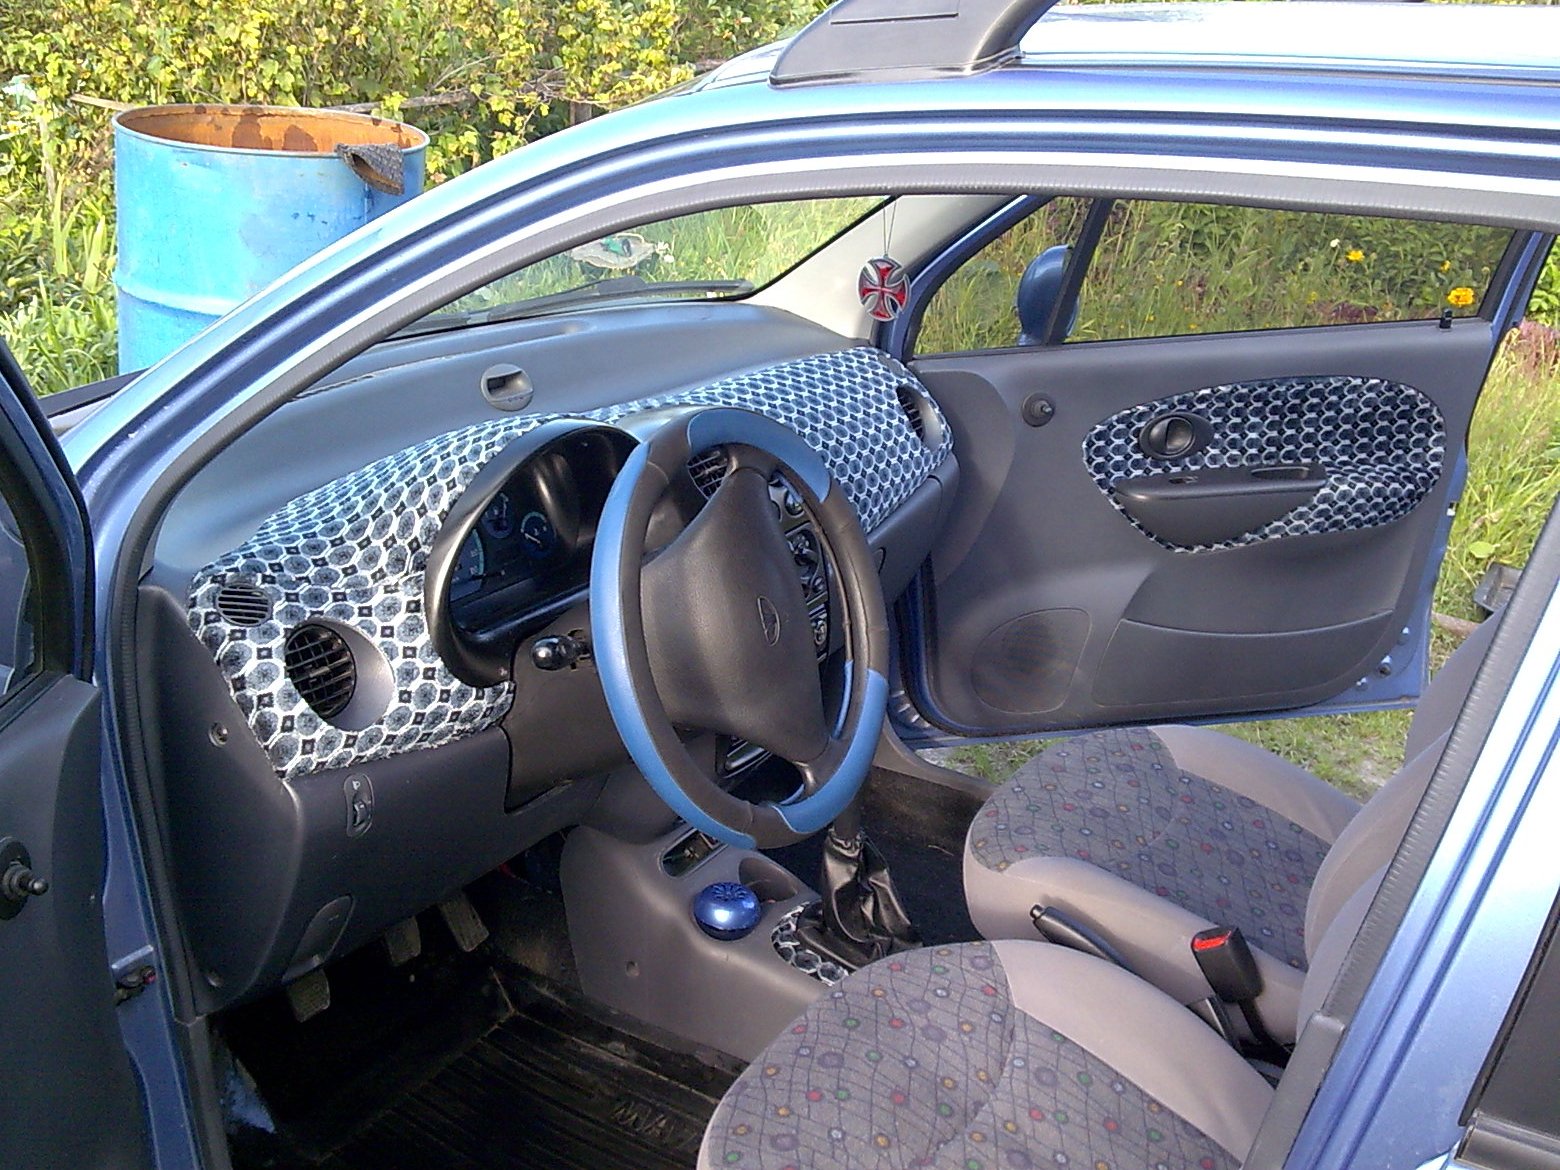
Tuning salon ("Daewoo Matiz")
Modernization of the interior of the car makes it possible to make stay in the cabin more comfortable. Some users independently change the standard armchair in height or mount new seats. Often, refinement concerns the steering wheel (instead of a regular version, a sports steering wheel is installed).
For more convenient inclusion of speed, cut the long handle of switching gear. Native rubber pads on pedals can be replaced by special shields that increase the surface of the press and interfere with the slip of wet shoes.
Pens above the doors, noise insulating seals are put as additional arrangement. Also, the tuning "Matiz" provides for the replacement of standard upholstery on a leather or dermatine option. Correctly picking up the combination of calves and style, you reach the original design of the cabin. You can additionally decorate inside the car using the neon backlight of the instrument panel and some other nodes.

Tuning engine "Matiz"
The power unit under consideration of the vehicle version 1.0 can be improved independently to a 1.2 liter indicator. To do this, it will be necessary to install the piston part and the crankshaft from Chevrolet Aveo. In addition, another series of operations is performed:
- installation of a camshaft with an increased torque;
- replacement of throttle;
- installing another nozzle.
After conducting such serious implementation, it is necessary to chip the electronic control unit. This manipulation itself improves the operation of the power plant and the nodes aggregating.

Modernization of the technical plan
The technical refinement of the car under consideration makes it possible to display dynamic parameters to a new level, as well as reduce gasoline consumption and increase controllability. In this regard, regular shock absorbers, inclined to failure, become a priority element for improvement when moving on domestic roads. With the right selection of the spring, the vehicle feels more confidently by the track and is not afraid of "lying policemen."
According to user feedback, tuning "Matiza" with their own hands is quite possible, while at the disposal of the motorist, an endless field for the implementation of creative and practical implementation. Among the nodes, most often subjected to modernization, the body, salon, light elements and the running part are noted. Having certain skills, you can make a real unique masterpiece.
Summing up
As practice shows, there is no limit to perfection. Folk craftsmen are able to transform the original, but a rigorous car into an exclusive and individual unit. Tuning "Matiza" is quite realistic to fulfill independently, without resorting to expert services. Despite the quite worthy equipment of the car, there is a river, which the owners of an inexpensive and economy car will be improved.

Thanks to the alterations, the vehicle receives great opportunities over the dynamics, equipped with a beautiful illumination, a comfortable interior and a more stable running part. In any case, it is necessary to approle the modernization of the machine, taking into account the opinions of users and professionals.
It is best to start working on modernization from the elements under the hood of the car. Technical improvements make it possible to derive the dynamic characteristics of the car at all levels. The first thing to do for this is to replace regular Daewoo shock absorbers. For this, the details from Vaz Kalina are well fit. To perform a replacement procedure, the car must be raised. Next, you will need to prepare a set of screwdrivers and wrench keys. First, we raise one piece of the mathizer by the jack, remove the wheel and turn off the shock absorber contacts. Next, unscrew the brake pads and pull out silent blocks. After that, you can remove the shock absorber and install a new one instead. The entire design is collected in the reverse order and proceed to work on the next wheel of the machine. Tuning, made with your own hands, will allow the car more confidently to feel like a bad road surface and not be afraid of "lying policemen."
To increase the power Daewoo Matiz, you will need to finalize certain engine elements. An excellent option will be the installation on a compact crankshaft and pistons from Chevrolet Aveo, as well as the installation of a camshaft from Ford Focus.
The replacement also needs a regular throttle valve and Daewoo Matiz. For tuning, Spare parts from Hyundai Solaris or Ford Fiesta are well suited. After replacing all these parts, you need to perform a car tuning chip. However, flashing the engine ECU is possible only for models with an engine 1.0. As for engines with a volume of 0.8, here the owner will have to "twist" differently.

The first option is to purchase a special chip worth at least 5 thousand rubles. The second is the execution of a non-complete chip-tuning block, but the optimization of the work of some of its elements. To do this, it is necessary to remove the airflow limiter, which will increase the engine torque. After that, the car is worth translating to 95 gasoline. This is due to the fact that with an increase in the amount of air, the fuel mixture will need benzol molecules, which in 92 gasoline too little. Together with the replacement of gasoline Daewoo Matiz requires replacement of candles, which will entail the need to use exclusively synthetic automotive oils.
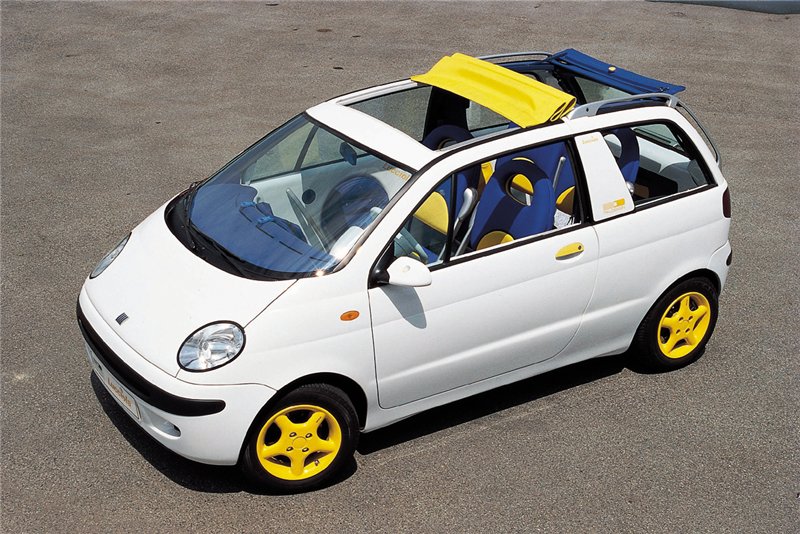
2 restyling compact model
The most popular options for external tuning Matiz is considered painting the bumper lattice, turn signals and mudguards. In addition, the Daewoo owner has the ability to replace regular optics, wheels and install spectacular. In a word, this model is an excellent platform for the embodiment of all the wishes of the driver.

Standard car design was developed by the designer studio Italdesign. Her employees attached a car "Cartoon" appearance, adding its large expressive headlights and a "wide smile" of the bumper lattice. A good restyling version will be the continuation of the design idea and installing the spectacular LED backlight on the car. To do this, you must purchase a ribbon with additional light bulbs and attach it to the front bumper. For the reliability of fastening it is worth using special suckers. Nutrition LED tape is performed due to the dimensional lights of the Matiz. Thus, in the late afternoon, your car will "smile" everything brighter, attracting the attention of other drivers and pedestrians.

If you go to make the appearance of the car more aggressive, you can install new shoes and plastic boxes. This will require:
- glue;
- soap solution;
- degreaser;
- set of plugs.
Initially, it is necessary to clean and degrease the bottom of the body. After complete drying, we take glue for plastic and applied its thick layer from the bottom of the body. Then we apply the bunches, trying to align them with the body until the glue is dry. After that, check the reliability of the attachment. If the kites "grab" with the body, then take the plug and insert them into the holes of the lining.
3 spectacular tuning salon Matiz
A logical addition to chip tuning, the replacement of parts and external modernization of the car will be the revision of its cabin. First of all, Daewoo Matiz needs to replace regular seats for higher and soft. To do this, you can use the details from LANOS. And for those and for others, standard fasteners are suitable, their replacement will take no more than an hour. If you have completed a sport tuning, then in its salon it is worth installing a small steering wheel of a sports type. Another necessary thing will be the replacement of the MATIZ gear lever. If you have installed higher seats, then this can not be done. But if you did not find the seats, then the lever will have to change the element with a short leg.

If you wish, a cheap standard outcome can be changed on the leatherette. It is mounted on the ceiling, top of the thresholds and in the back near the trunk Daewoo Matiz. By changing the staffing upholstery, you will give the interior of the machine individuality and character. And if you set the foam under the trim, then also improve the noise insulation of the car.

The main thing in the tuning of the Matiz salon is to stick with a particular style, because the machine's cabin has small sizes. Therefore, if you chose one direction, then act strictly according to it, and not install the sports parts and elements of another style in the car.
The Daewoo Matiz car is already initially a fairly good and high-quality vehicle. The car is characterized by a good design, high level of comfort, large capacity. This is a full-fledged four-bed car, ideal for riding in the city, which is designed for the maximum convenience of drivers and passengers. We can safely say that Daewoo Matiz does not require any serious refinement.


The vehicle is originally equipped with a large windshield, which opens a great overview. Successfully fit in the interior of aerodynamic mirrors of the side view. It is distinguished by comfort, security, good technical characteristics.
Tuning Daewoo Matiz
However, car enthusiasts who wish to highlight their cars on the background of others, may well make tuning Daewoo Matiz. Since the car is very popular, which indicates that it is not so difficult to meet him on the roads, wishing to change the Mathiz is not so little.


If you already have at least a little experience in tuning cars, then the tuning of this model will not be much difficult for you, and you will be able to modernize any level of complexity.


Best to do tuning Matiz do it yourselfSo that you can avoid unnecessary expenses on masters in special tuning centers.
Wheel discs are very strong on the appearance of the car. Stylish wheels will give Daewoo Matiz solidity. It is not difficult to choose the desired model of the disks, as they are present in the stores in a fairly large assortment.
Tuning Salon Matiz.
Both the driver and passengers want to be comfortable in the car, so it is necessary to make a tuning of the Matiz interior. To do this, you can replace the standard upholstery of the outcome of the material you need. Salon can be hidden skin that give the car a more luxurious look, however it will be quite expensive. Therefore, many car owners prefer to use leatherette as an upholstery.


.jpg)
Much attention should be paid to the color decision. There are no special recommendations for this account, but everything should be done quite harmoniously and stylish.
It is necessary in the cabin to make high-quality noise insulation by setting special noise insulating seals for this.
One of the most important parts of the cabin is the steering wheel, so making tuning needs to be improved. For Daewoo Matiz, the steering wheel of a sports type is perfect. Such steers are often sold with additional devices and gadgets that will be very useful and make a car control more convenient.
Tuning body Daewoo Matiz
Nothing changes the appearance of Daewoo Matiz as the body tuning. To perform tuningDaewoo. Matiz.You will need to purchase various plastic lining, which without any problems can be fixed on special glue. Such linings will not scratch the salon of your car, and if necessary, you can easily remove them. Looking forward a more sporty view by installing new shoes on the matz.


Tuning Headlights Daewoo Mathiz
Daewoo Matiz headlights should not be issued. To do this, you need to install additional backlight, as well as pick up new headlights. The car in its original form is equipped with oval headlamps that make the appearance of the car quite cute and well fit into the overall design. Lighting from these heads arranges almost all car owners.


.jpg)
There should be no problems with the choice of new headlights, since their range is quite wide. If you think that the car has insufficient standard lighting, you can enhance it with xenon lamps.
A set of tuned headlights will make the car original and allocate it among other Daewoo cars.
Daewoo Matiz engine tuning
Of course, the appearance and interior tuning is a very important task, but not less, and maybe even more, and technical tuning. Technical tuning allows you to improve dynamic characteristics, reduce fuel consumption, increase driving comfort.


Any serious change in the technical parameters of the car requires chip tuning. Chip tuning is a flashing of the electronic engine control unit, which leads to significant improvements in the car. Now chip tuning is done on all cars, including Daewoo Matiz.
After the exterior tuning, the cabin is made, must be supplemented with a car with various accessories and trifles that will make trips even more comfortable and pleasant. For example, a mat into the salon can be one of such accessories. To see how much it can change this car on tuning Daewoo Matiz photo.


